Virtual machines protection and backup solutions are more important nowadays with the plethora of ransomware out there in the wild. Nakivo Backup and Replication is an enterprise grade software solution that will protect your workloads against data loss, site failure and help with ransomware recovery.
In this blog we will go through the steps to get Nakivo Backup and Replication up and running. Remember that you can get an unrestricted 15-days free trial.

Nakivo Backup and Replication v10.4
Nakivo recently released NBR v10.4 of their Backup and replication solution. This latest release includes important improvements such as:
- Immutable Local Repository: Feature that allows you to make recovery points in a local Backup Repository immutable for a specified period of time. Immutable backups are protected from deletion, modification, and encryption by ransomware.
- Two-Factor Authentication: Two-Factor Authentication for users accessing the product web interface. This update provides an additional layer of security against malicious access to backup data by requiring a verification code in addition to the username and password when logging in.
- File Recovery for Nutanix AHV VMs: NAKIVO Backup & Replication now supports file recovery for Nutanix AHV VMs.
If you want to upgrade to vSphere 7 Update 3 (7.0.3) in your environment, make sure to update to Nakivo Backup and Replication v10.4.1 beforehand as it supports it.
Deploy Nakivo appliance
First, let’s start by downloading the appliance that we will deploy in our vSphere environment. Before deploying, consider reading the Ransomware best practices to protect your backup infrastructure, which may become your last line of defense.
- Click on the Download Free Trial link above and download the VMware appliance.

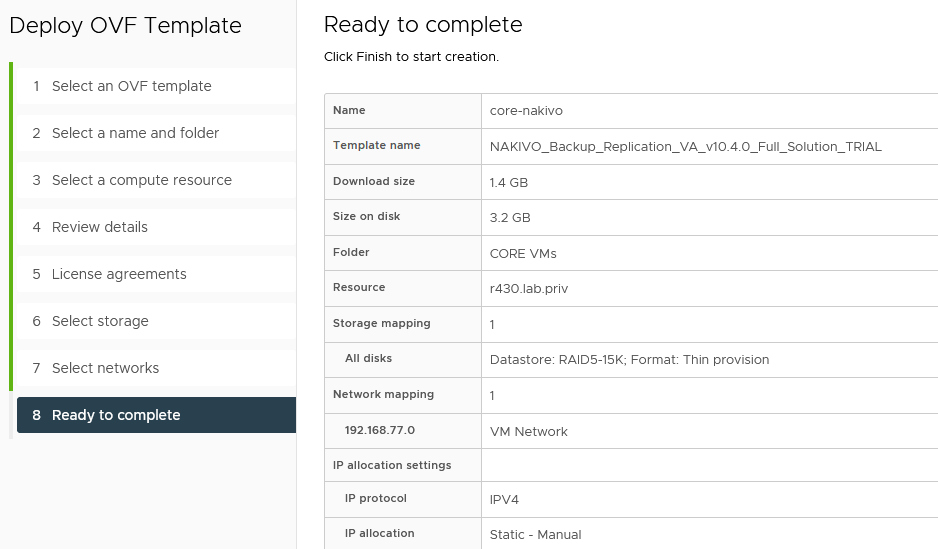
- Then log in your vSphere environment and deploy an OVF template. Note that the appliance is provisioned with 2 vCPU, 4GB of RAM, 30GB system disk and 495GB of repository. You obviously don’t have to use it should you use network locations.

- Select NAKIVO_Backup_Replication_VA_vxxx_Full_Solution_TRIAL and proceed to deploy it.
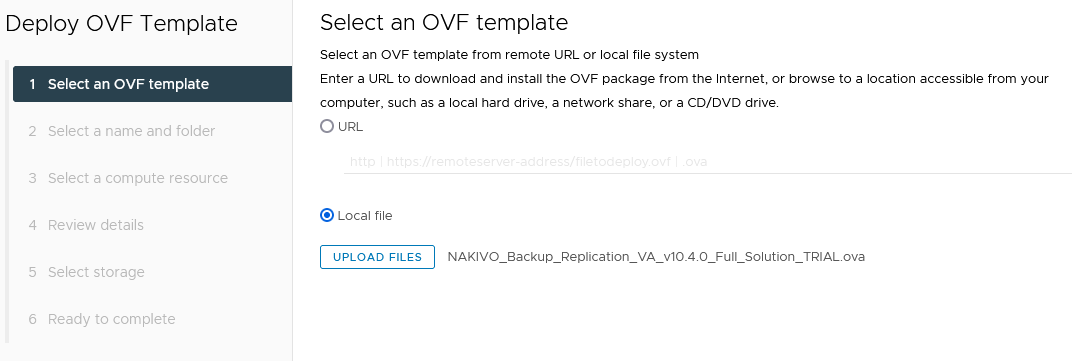
- Make sure the prerequisites are met and deploy the appliance.
Configure Nakivo Backup and Replication
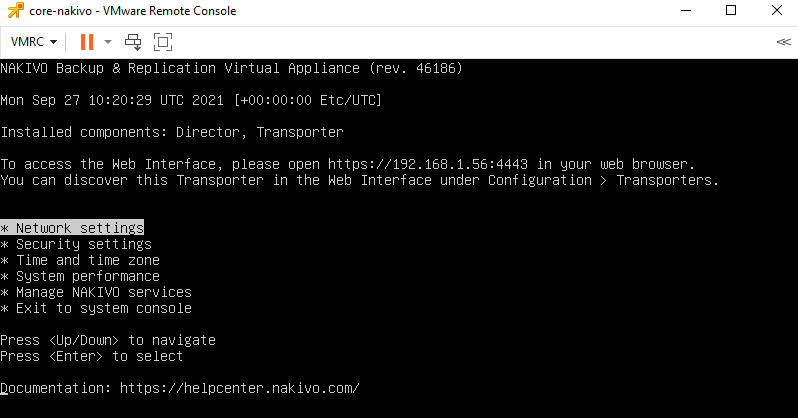
Now that the appliance is deployed in our environment, open a web browser to:
https://machine_IP_or_DNS:4443
- Create a Nakivo account if you don’t already have one.

- You can also change the network settings by opening a virtual console on the Nakivo VM should you need to change those.
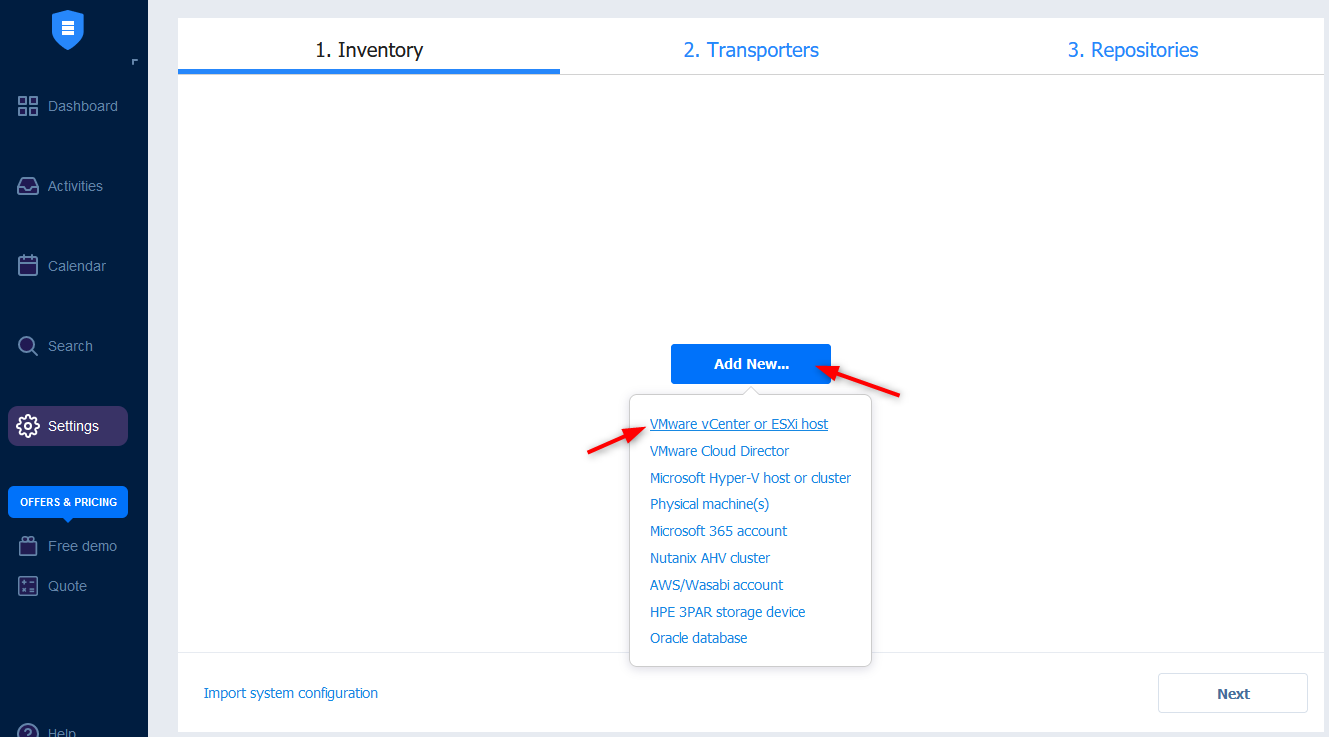
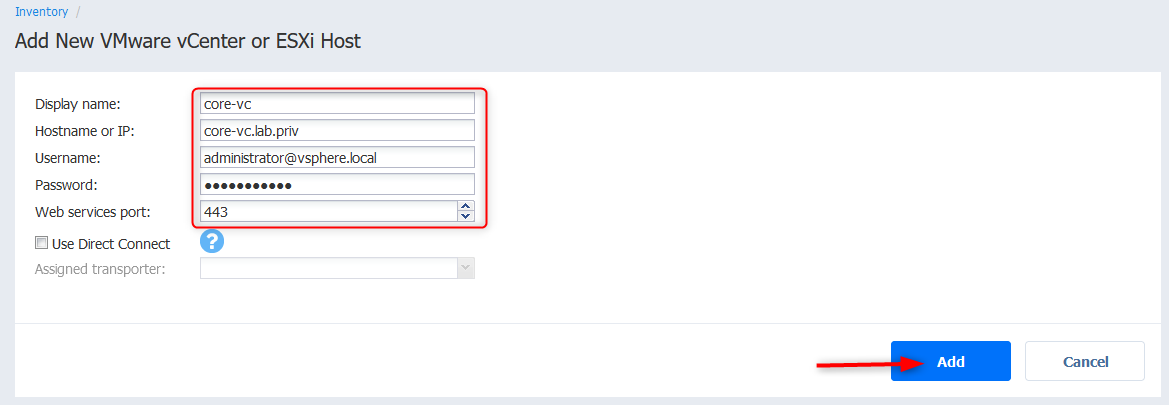
- Once you are logged in the web browser, go to Settings > Inventory > Click on Add New… > VMware vCenter or ESXi host
- Punch in the details of your vCenter server and click Add. Note that DNS must be properly set to resolve the FQDN. You can also specify a dedicated account for Nakivo to obtain better tracability in the vCenter events during operations.
- The vCenter server should appear with the hosts and VMs count and click Next.
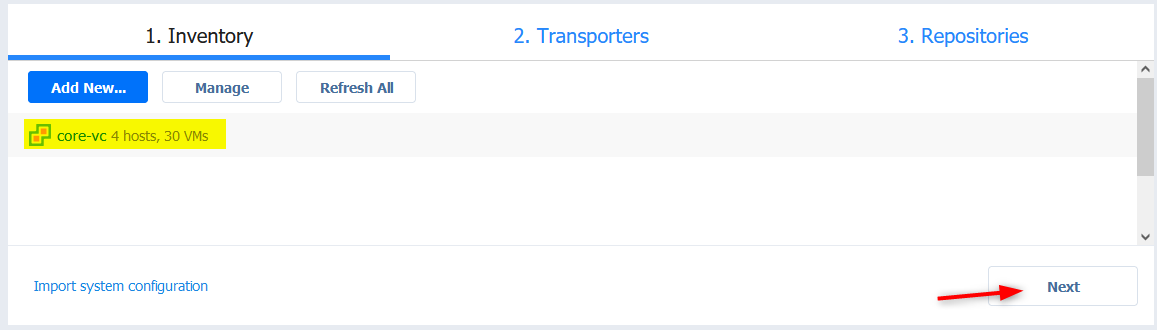
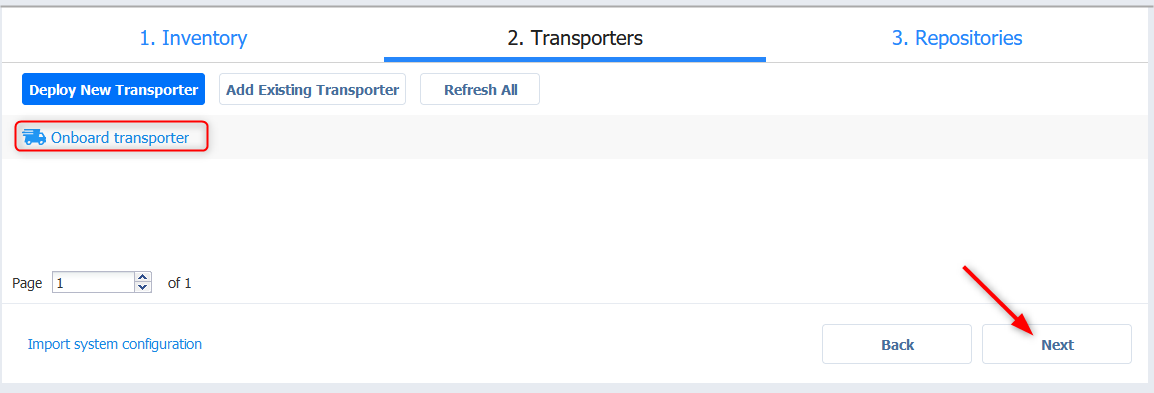
- You can leave the default onboard transporter for now (max 6 concurrent tasks) and click Next. You may need to add dedicated extra ones as your needs grow.
- By default you get a local repository on the second virtual disk. We’ll add an NFS repository here for the example. click Add Backup Repository.
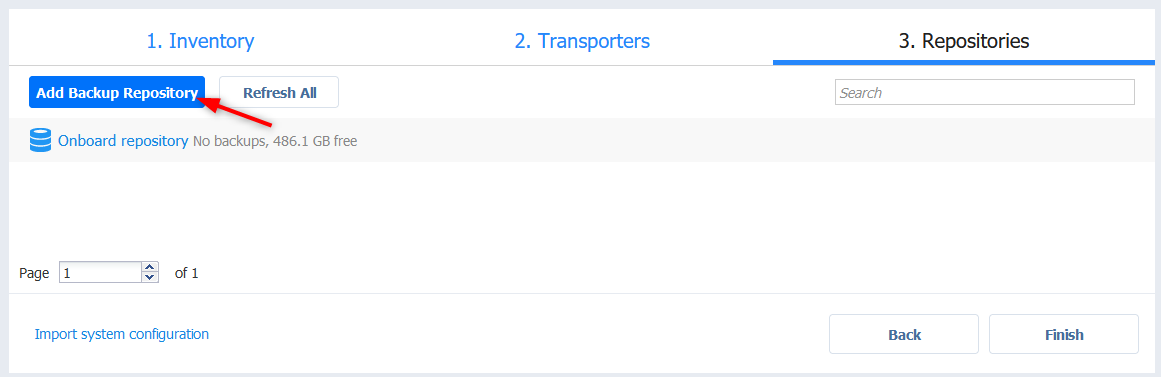
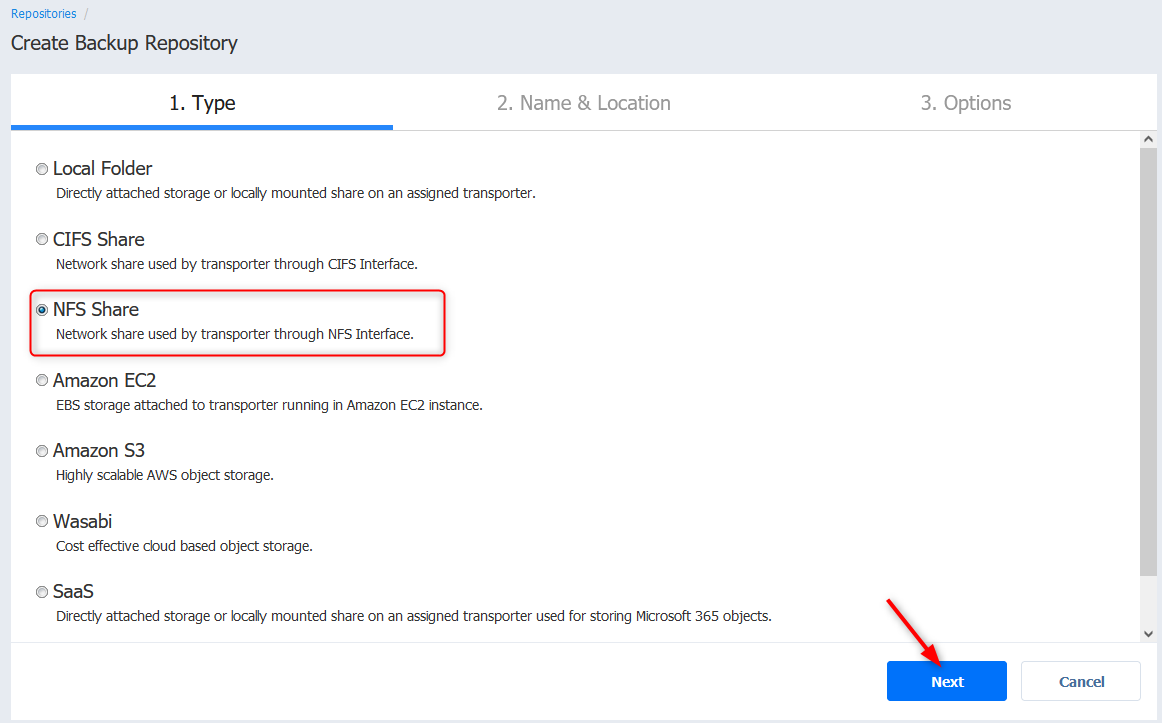
- Select NFS Share and click Next. As you can see there are plenty of options to choose from when it comes to repositories.
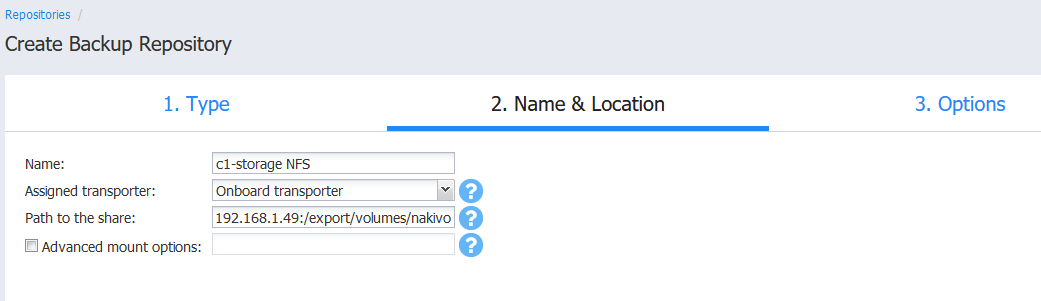
- Give the share a name, a transporter and type in the path to the share. In my case it is an NFS export on a test Debian VM (192.168.1.49://export/volumes/nakivo)
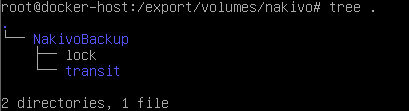
- Once created, the shared folder includes a few Nakivo files and folders.
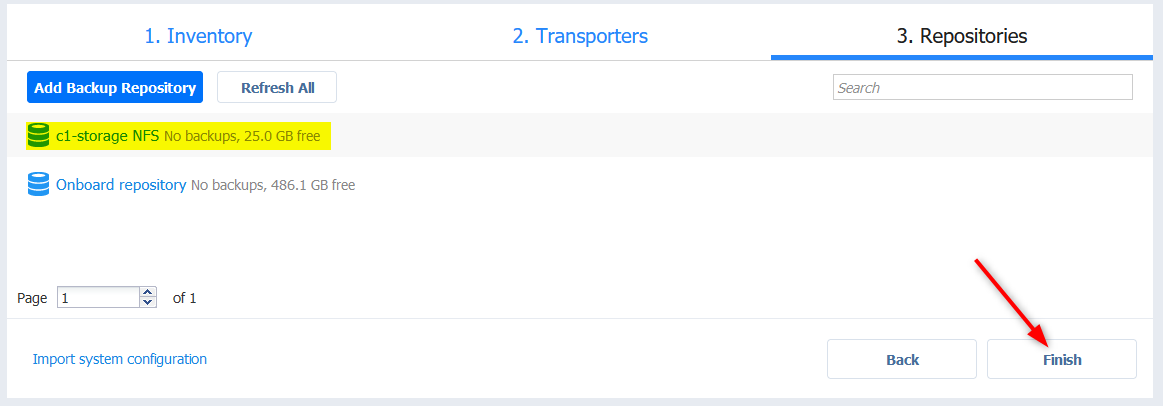
- Anyway, the NFS share should appear in the list, you can now click Finish.
Create a VMware VM backup job
We will now create a basic backup job based on virtual machine tags. Prior to achieving this you will need to create a tag category in vCenter and assign a VM tag specific to the VMs you wish to include in this particular job. Note that you can achieve the same result based on folders and other VM metadata.
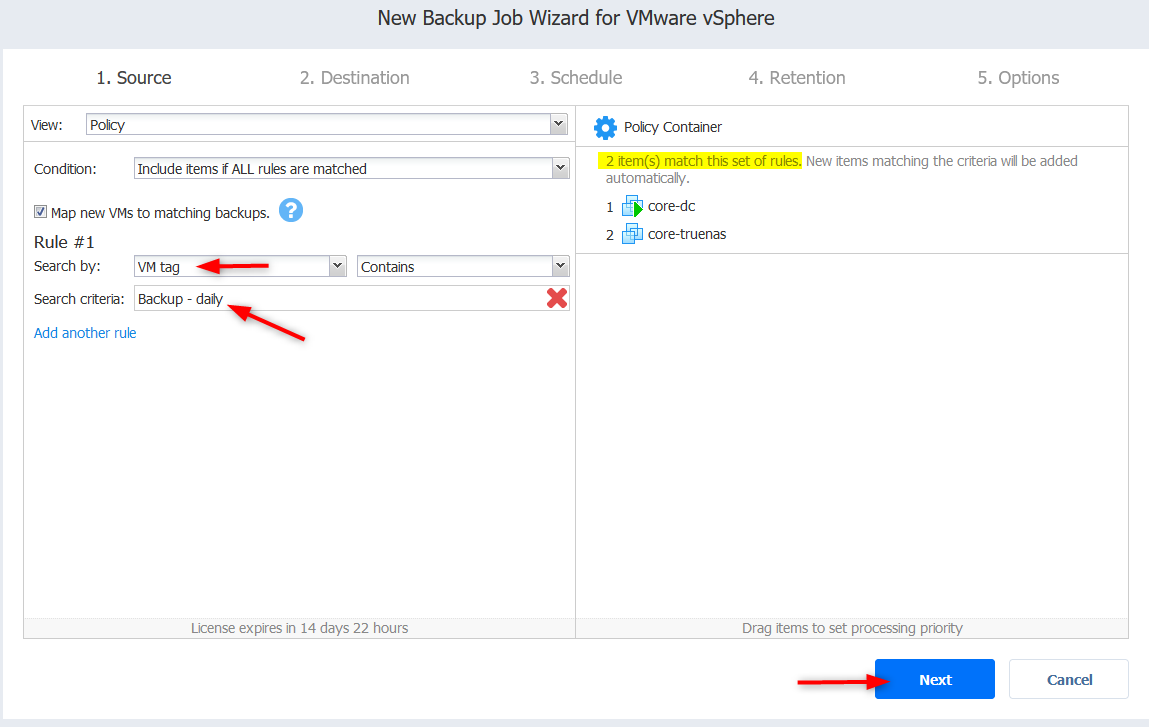
In our example below we are using a tag category named “Backup - daily” that we attached to 2 VMs.
- Go to Dashboard > + Create > VMware vSphere backup job.
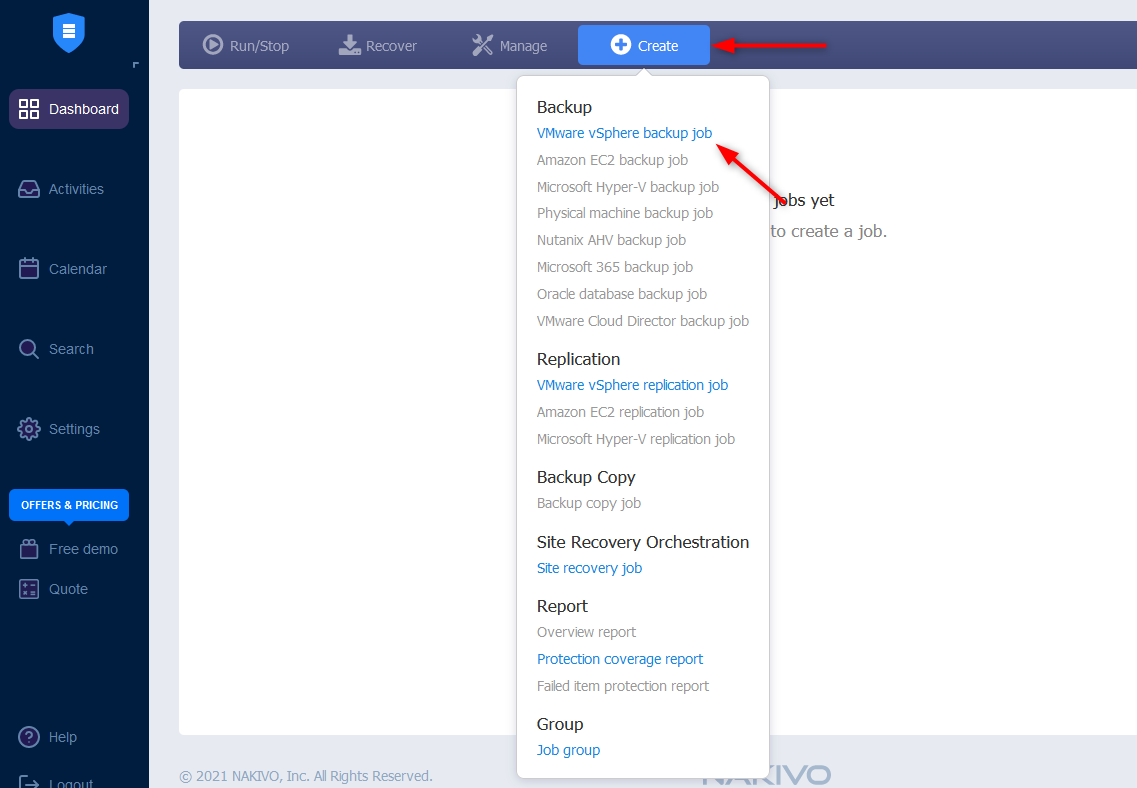
- Set View to Policy, Search by VM tags and type the tag specific to this job. Note that you may need to refresh your vCenter source in Nakivo if you just added it. The tagged VMs should appear on the right. Click Next.
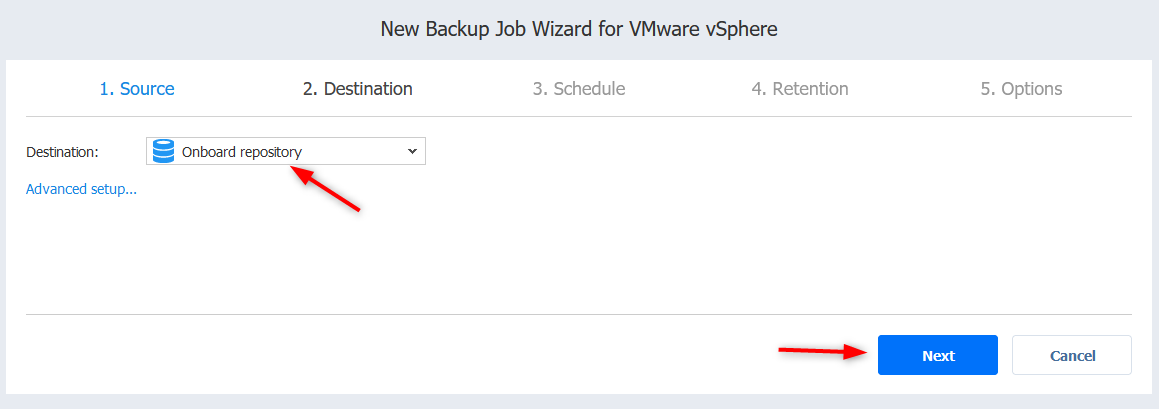
- You then get to select a repository. You can choose from the onboard repo or the NFS one we created earlier. Click Next.
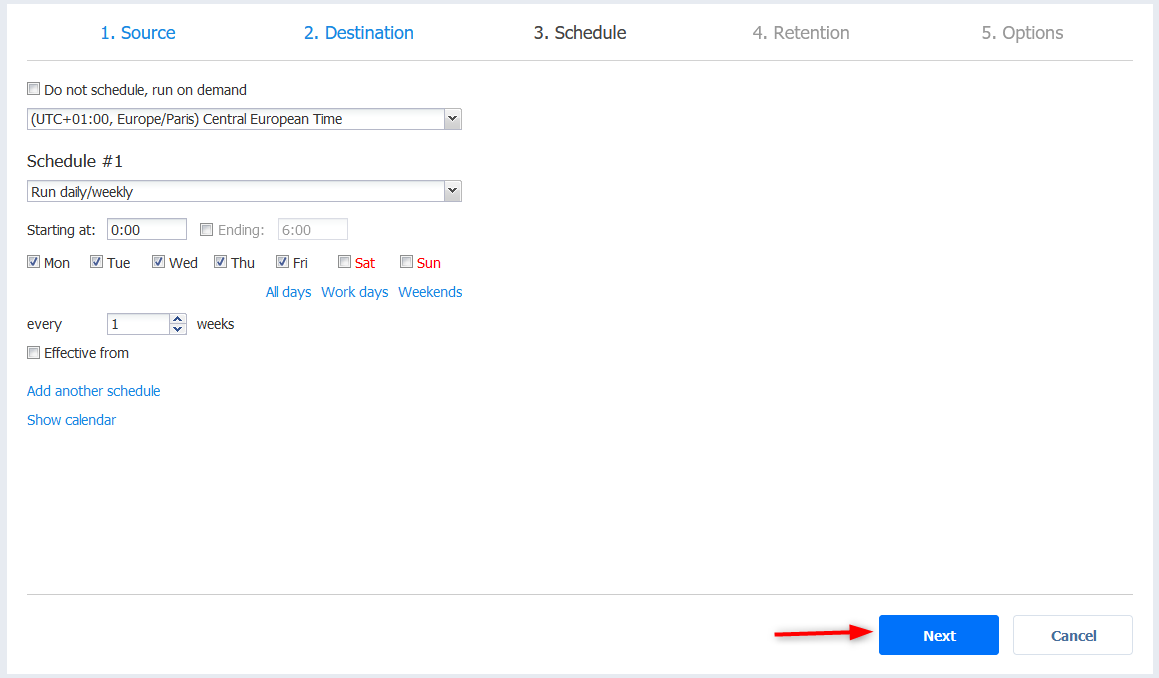
- In Destination, configure the schedule that works for you. Just try to select a backup window that won’t clash with any IO intensive operations such as crons and you usually want to avoid production hours.
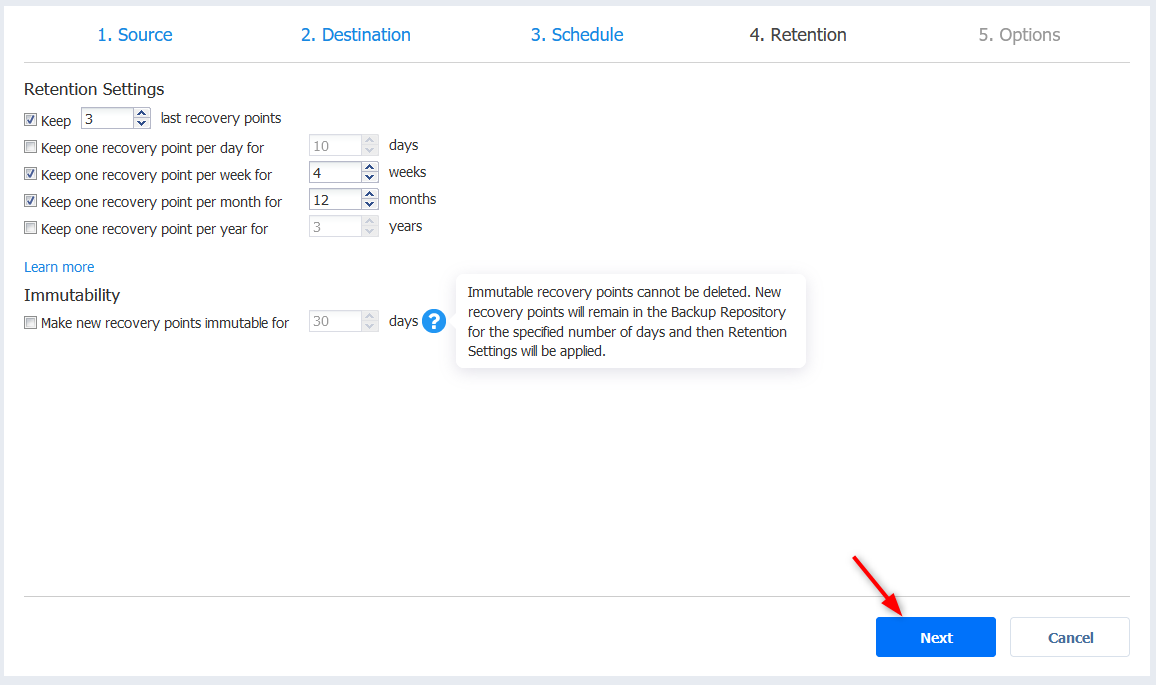
- You can then configure the retention for your backups in a granular fashion and decide for how long to keep copies of your data. You can also make your recovery point immutable, meaning they cannot be altered. This is an effective line of defense against Ransomware that target backup files. Click Next.
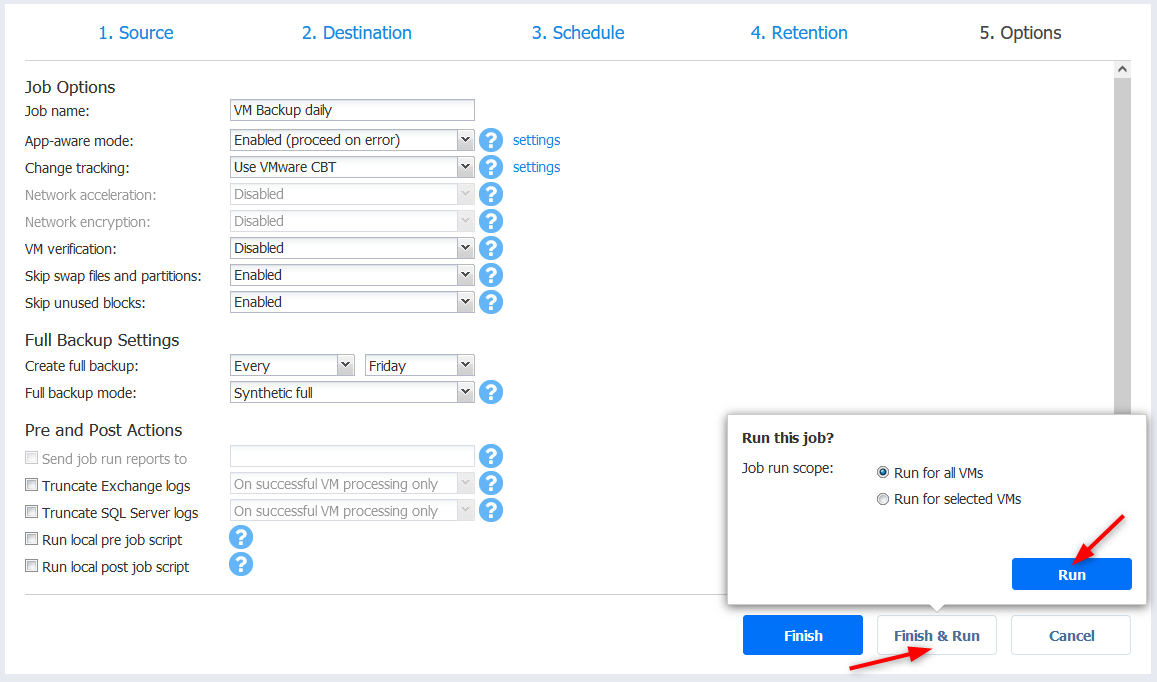
- Finally, you get to configure a number of options for your backup job. They are pretty self-explanatory and those will very much depend on your needs and environment. Leave the defaults if you aren’t sure about those and Finish the wizard. I decided to start the job but you might not want to do this if you are in production during working hours.
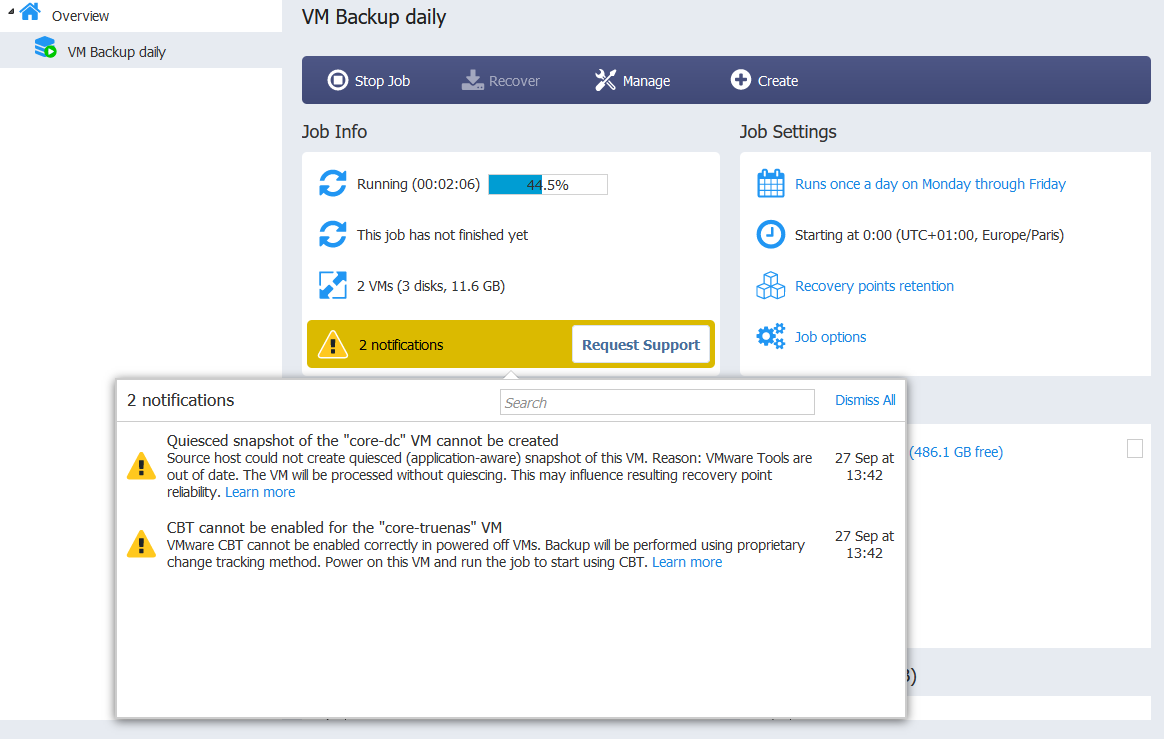
- You can now go back to the dashboard and get an overview of the job. I get warnings because one VM has outdated VMware Tools and the other one is powered off but the backups will run just fine.
- At the end of the job, the status should be completed without errors. If it isn’t, refer to the error messages and the logs if necessary.
Recovery of a virtual machine with Nakivo
Nakivo Back and replication lets you recover individual files, objects for Exchange, SQL, AD and a number of other objects. You can obviously recover VMs traditionnaly or use “Flash VM boot” to start it quickly from the repo. In this demonstration we will recover a VM from backup.
Keep in mind that you don’t want to recover a VM in the same subnet as the original one if it is still running, otherwise you will encounter IP duplicates.
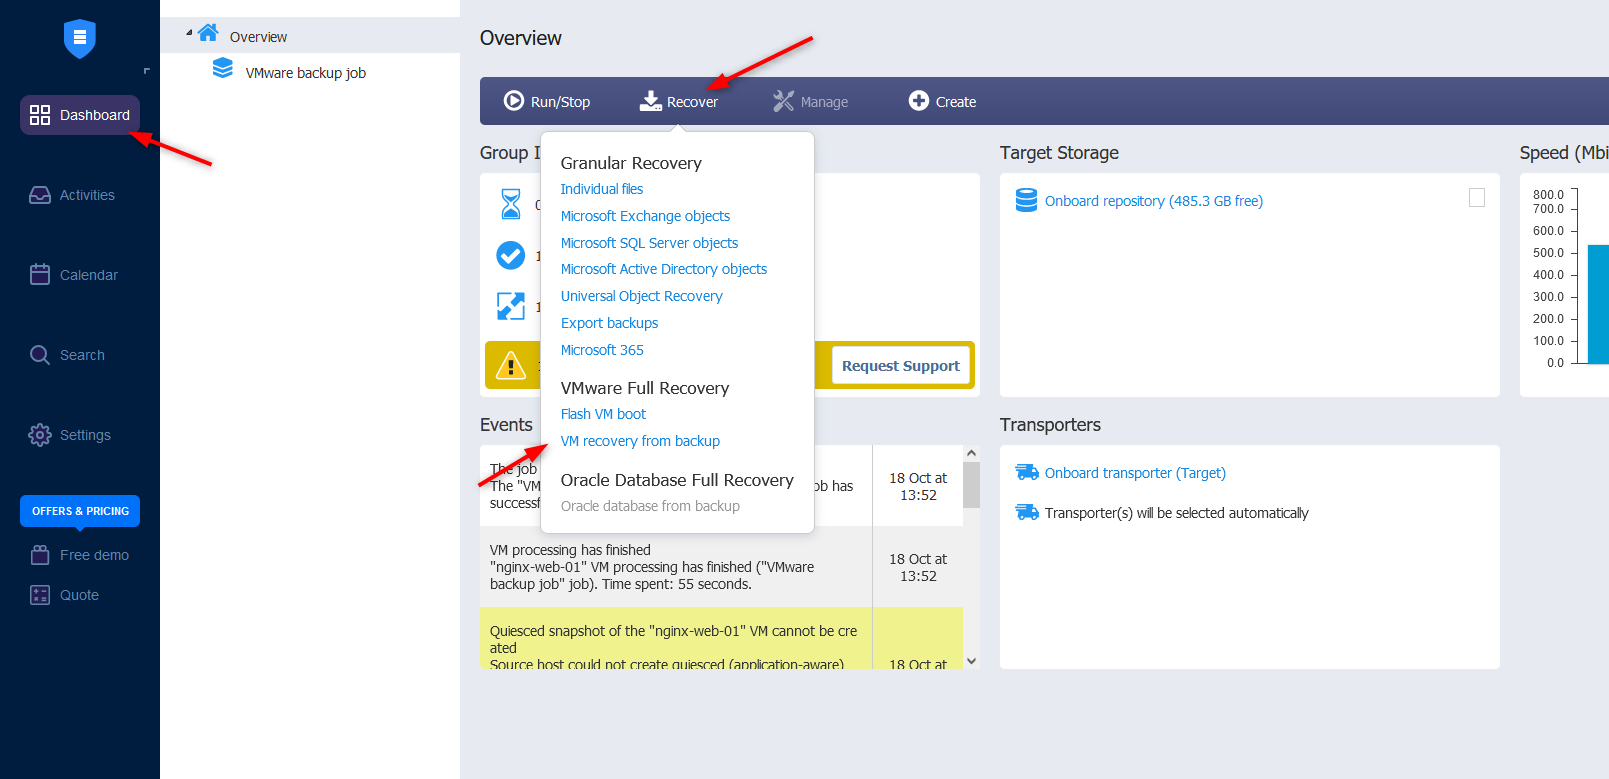
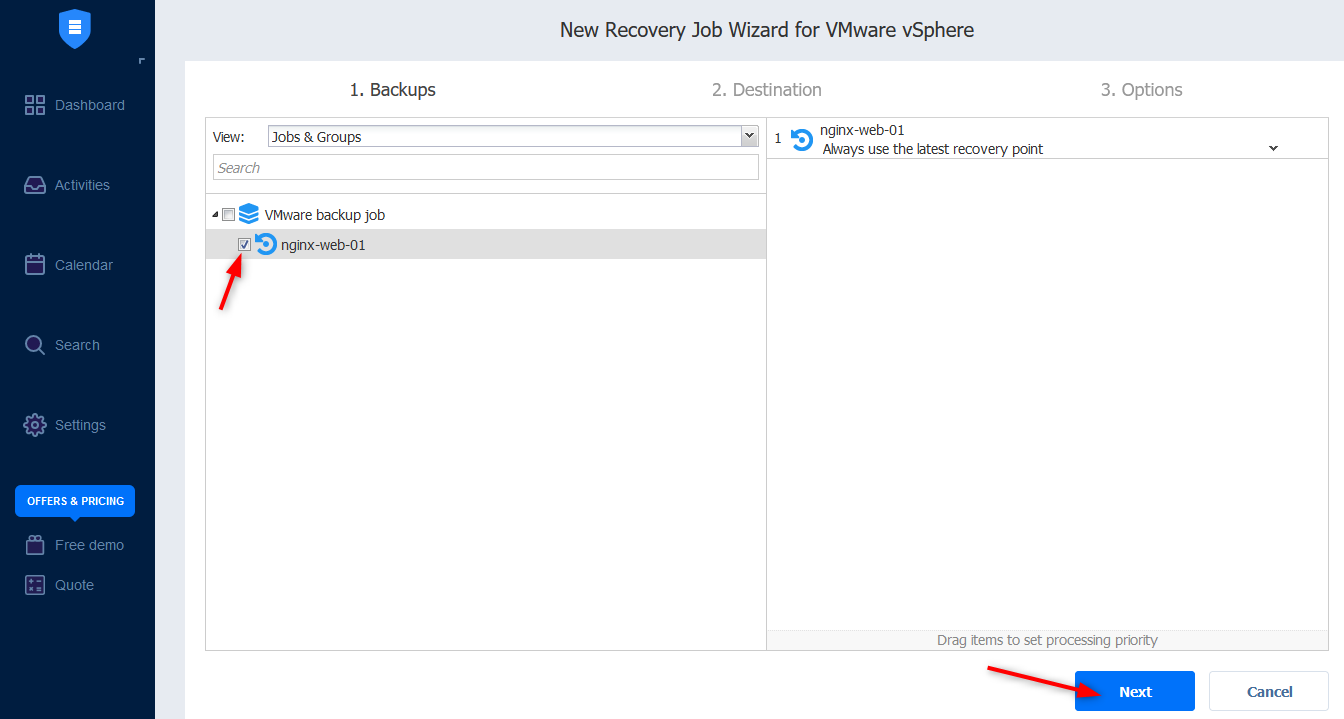
- Go to Dashboard > Recover > VM recovery from backup
- Select the virtual machine you want to recover and click Next. Note that you also get to choose the recovery point.
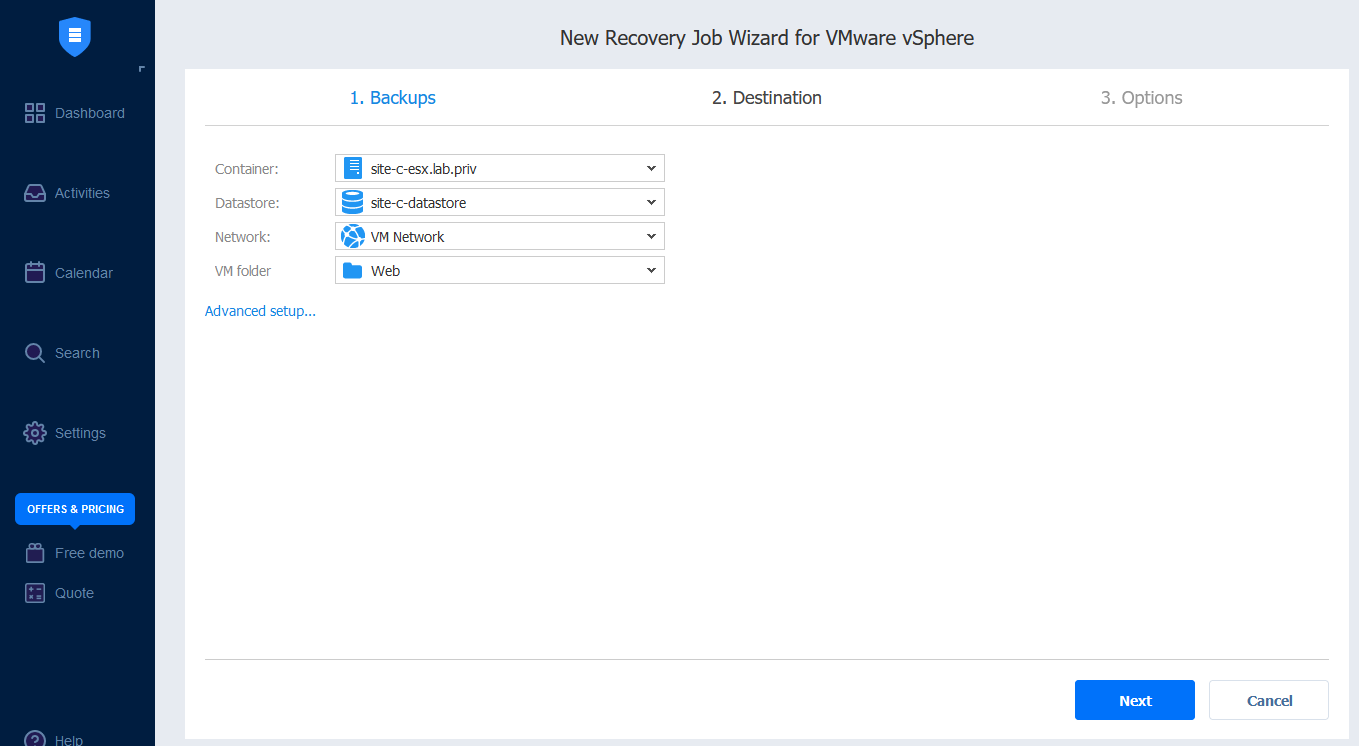
- Specify the characteristics for the destination where you want to restore it and click Next.
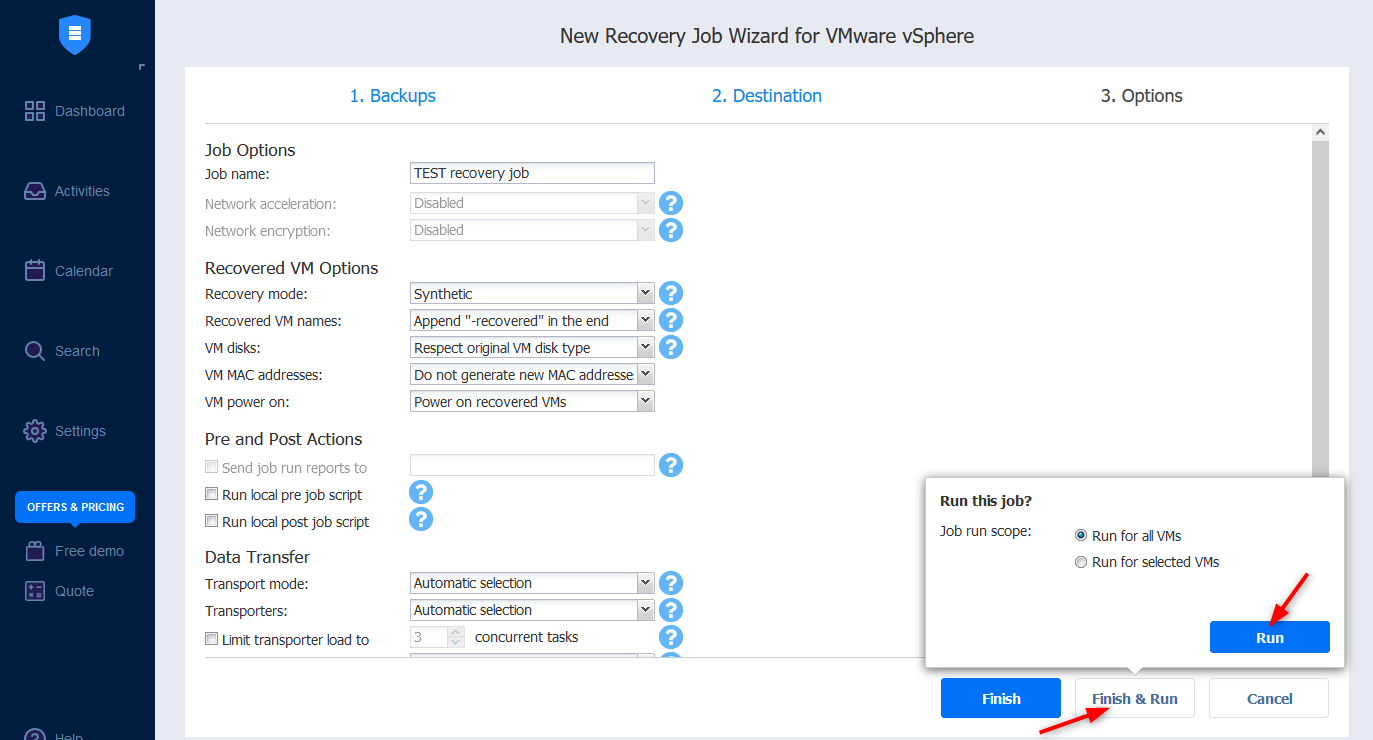
- Like in the backup job, you can configure the settings of the recovery job such as the recovered VM characteristics. Once you are happy with your settings, you can choose to create the job to run it a later time or run it immediately. We will do the latter here with Finish & Run.
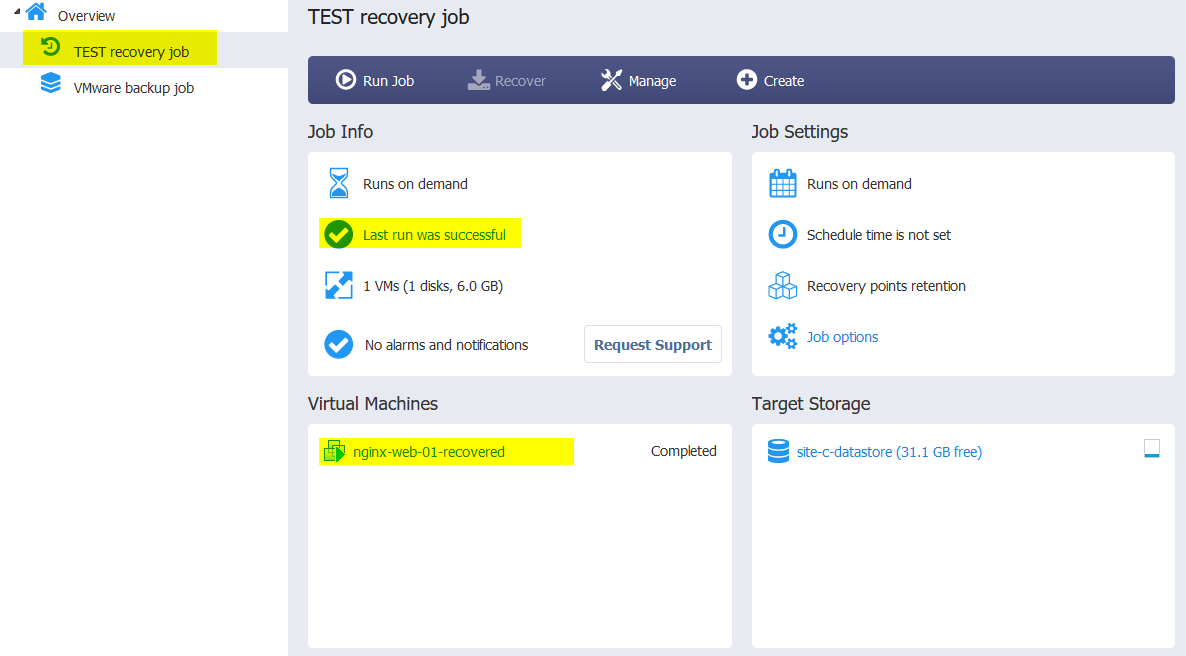
- In the Dashboard, you should see your recovery job ran successfully and the recovered VM running in the destination.
Wrap up
Virtual machine protection is paramount to every single organization. Even if your workloads run in stateless modern apps, there will be some aspect of data protection that you need to ensure is set up.