I recently wrote a piece about how to get started with CAPVCD, the Cluster API provider for VMware Cloud Director and kept playing with it. One of the great things with CAPVCD is that the upstream implementation automatically deploys the VCD CSI into the workload clusters using a ClusterResourceSet (I also wrote about those some time ago). A ClusterResourceSet is a CR that uses a configmap which describes resources to be installed in a workload cluster. Cluster API Provider VMware Cloud Director (CAPVCD) has ClusterResourceSets for the CNI (Antrea), the CSI (Storage) and the CPI (Load balancer). Today we are looking at how to use the CSI in a basic fashion.
EDIT: Correction, the CSI and CPI aren’t actually installed through ClusterResourceSets but via the VMware Tools. This is a bit surprising but why not.
VMware Cloud Director Named Disk csi driver v1.2.0
In VMware Cloud Director, Named disks are standalone virtual disks that you create in organization virtual data centers (VDCs). Organization administrators and users who have the necessary rights can create, remove, and update named disks, and connect them to virtual machines. Named Disks are pretty cool because they are standalone, as in they aren’t tied to a virtual machine. The driver supports ReadWriteOnce (RWO) and ReadOnlyMany (ROX), ReadWriteMany (RWX) is not supported (Thanks to Marko Uskokovic for pointing this out). In fact, when a named disk is created, it is attached to a dummy VM called Disk shell VM. For more details about Named Disks, you can refer to the official VMware documentation.
In this article I won’t go down the rabbit hole of manually installing the VCD CSI as I am provisioning my Kubernetes cluster in VMware Cloud Director using CAPVCD (much faster and easier). Also the most common and user friendly use case at the moment is through CSE (Container Service Extension). If you want to go full rambo with this, the manifests are stored there and the configuration is done in vcloud-basic-auth.yaml and vcloud-csi-config.yaml.
Anyway, I will stick to CAPVCD being my use case. Once a cluster is deployed, check that the CSI components are running in the kube-system namespace.
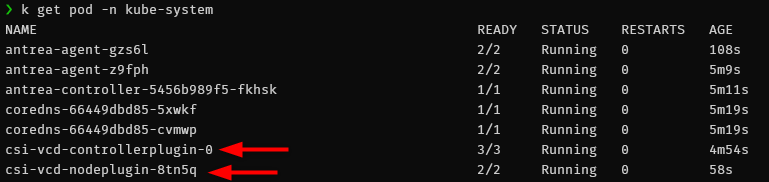
Note that the default version CSI 1.1.0 has a bug that prevents pods from mounting named disks so make sure to use version 1.2.0 when deploying the cluster. You can check the current version in use with the following command:
kubectl logs -n kube-system csi-vcd-controllerplugin-0 vcd-csi-plugin | head -n 1
I0530 10:09:32.867905       1 driver.go:56] Driver: [named-disk.csi.cloud-director.vmware.com] Version: [1.2.0]
Create persistent storage with the VCD Named Disk csi driver
Disclaimer, I used a sample from the official cloud director named disk csi driver repository.
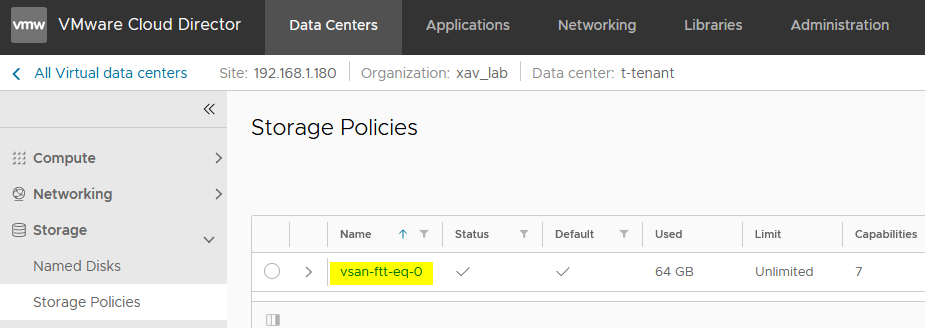
- First apply a storage class (sc) that references the storage policy you want the PVCs to use.
kind: StorageClass
apiVersion: storage.k8s.io/v1
metadata:
  annotations:
    storageclass.kubernetes.io/is-default-class: "false"
  name: test-sc-xav
provisioner: named-disk.csi.cloud-director.vmware.com
reclaimPolicy: Delete
parameters:
  storageProfile: "vsan-ftt-eq-0"
  filesystem: "ext4"
The output should look like so but you can of course change it to your needs.
k get sc
NAME          PROVISIONER                                RECLAIMPOLICY   VOLUMEBINDINGMODE   ALLOWVOLUMEEXPANSION   AGE
test-sc-xav   named-disk.csi.cloud-director.vmware.com   Delete          Immediate           false                  2s
- Then create a persistent volume claim (PVC) referencing the storage class.
apiVersion: v1
kind: PersistentVolumeClaim
metadata:
  name: test-pvc-xav
spec:
  accessModes:
    - ReadWriteOnce
  resources:
    requests:
      storage: 1Gi
  storageClassName: "test-sc-xav"
After a short moment, the output should look like so but you can of course change it to your needs. You should also see a persistent volume (PV).

You should also see the newly created persistent volume in the Named Disks section of your Cloud Director tenant.
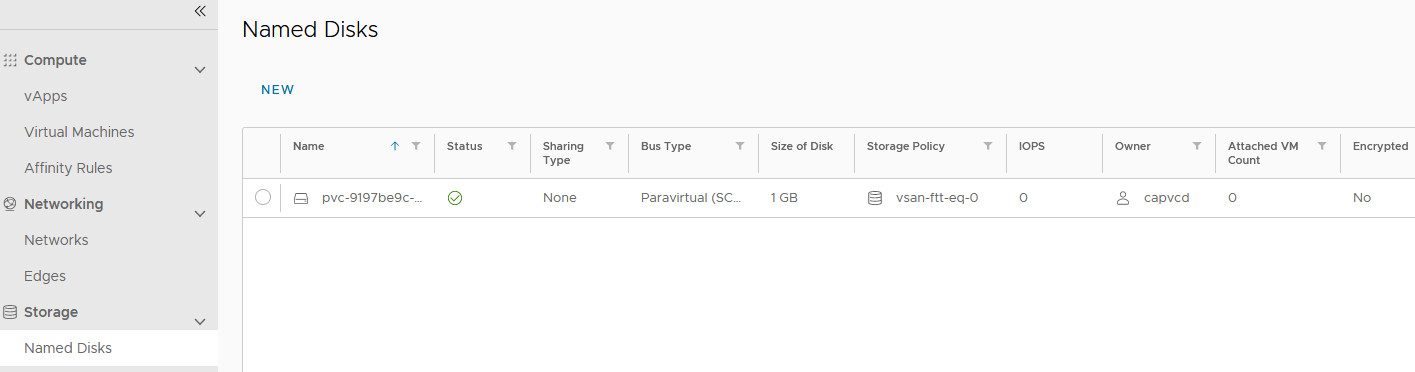
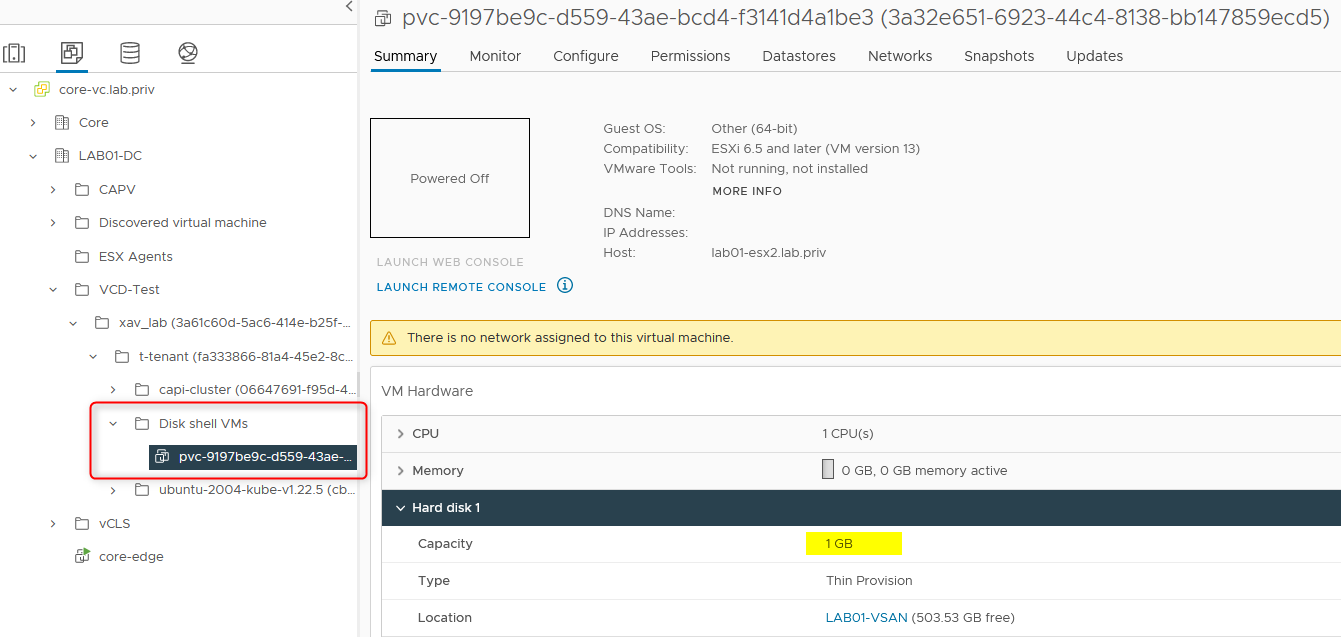
At this point in time, you will find a new VM in vCenter in a Disk shell VMs folder. This VM is like an empty shell, it has no resources, no OS and its only purpose is to keep track of the virtual disk so it doesn’t disappear in the abyss of the datastores when it is not attached to a VM. Because we only created the disk/PV so far, no VM/K8s node is attached to it.
- Now let’s attach the volume to a pod by referencing the PVC.
kind: Pod
apiVersion: v1
metadata:
  name: test-vol-debugger
spec:
  volumes:
    - name: test-vol-xav
      persistentVolumeClaim:
       claimName: test-pvc-xav
  containers:
    - name: debugger
      image: busybox
      command: ['sleep', '3600']
      volumeMounts:
        - mountPath: "/data"
          name: test-vol-xav
After the image gets pulled, the pod should be running with the volume attached to it.
k get pod -owide
NAME                READY   STATUS    AGE    NODE
test-vol-debugger   1/1     Running   5m6s   capi-cluster-md0-54d44589ff-w562l
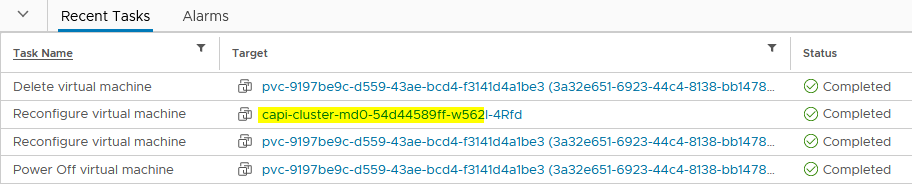
If you track the tasks in vCenter, you will notice the following:
- Disk Shell VMs gets powered off (in case someone turned it on, which it shouldn’t be)
- Named disk is removed from the Disk shell VM
- Named disk is attached to the worker node where the pod runs
- Disk shell VM is deleted
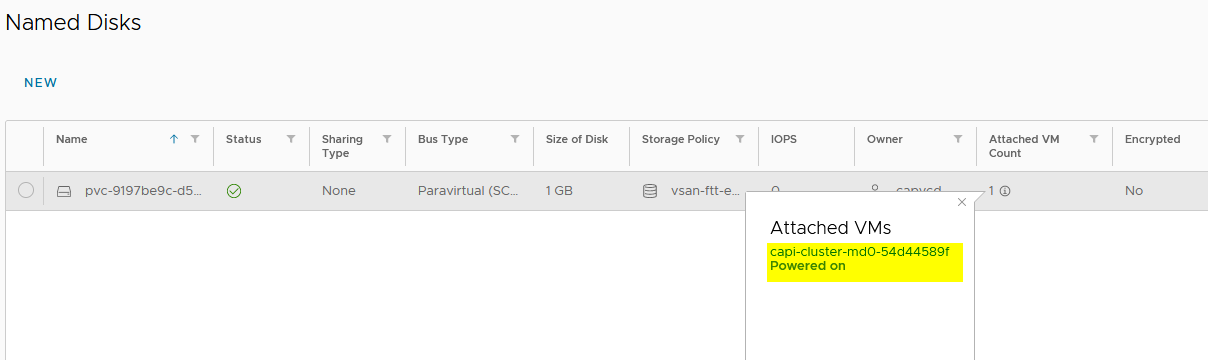
VMware Cloud Director will also reflect this change in the tenant portal where you can find which VM the named disk is attached to.
CAPVCD attached volume fail safe for cluster deletion
Now with CAPVCD, you will find that there is a fail safe that prevents you to delete a cluster if it contains a pod with a mounted volume and the cluster will be stuck in deleting state until you fix it. This is an extract of what you find in the logs of the CAPVCD controller in such case:
capvcd-controller-manager-79f9559488-vrnrs manager 2022-05-30T11:24:11.991Z     INFO    controller.vcdmachine   Cannot delete VM until named disk is detached from VM (by CSI)  {"reconciler group": "infrastructure.cluster.x-k8s.io", "reconciler kind": "VCDMachine", "name": "capi-cluster-md0-bsjn6", "namespace": "default", "machine": "capi-cluster-md0-54d44589ff-w562l", "cluster": "capi-cluster", "vm": "capi-cluster-md0-54d44589ff-w562l", "disk": "pvc-9197be9c-d559-43ae-bcd4-f3141d4a1be3"}

capvcd-controller-manager-79f9559488-vrnrs manager 2022-05-30T11:24:11.991Z     ERROR   controller.vcdmachine   Reconciler error        {"reconciler group": "infrastructure.cluster.x-k8s.io", "reconciler kind": "VCDMachine", "name": "capi-cluster-md0-bsjn6", "namespace": "default", "error": "error deleting VM [capi-cluster-md0-54d44589ff-w562l] since named disk [pvc-9197be9c-d559-43ae-bcd4-f3141d4a1be3] is attached to VM (by CSI)"}
- Delete the pod with the attached PVC. You will find in the vCenter tasks that it goes through the sames steps as before in the other direction.
- Disconnect named disk from the worker node
- Create Disk shell VM
- Attach named disk to Disk shell VM
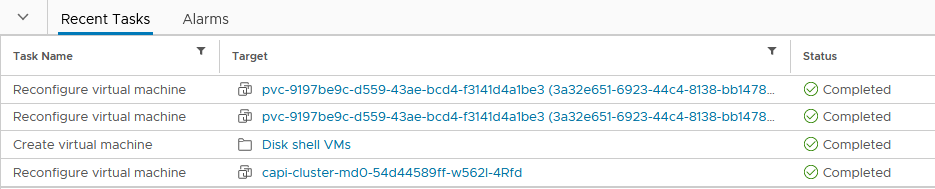
The cluster deletion will then proceed to completion.
Wrap up
Another one for the road about Cluster API with VMware Cloud Director. This is still a very new project but I am enjoying the process of learning about all the components and how they interact with each other (VCD, NSX-T, NSX ALB, vCenter, CAPVCD, Kubernetes…). While this is a pretty complicated setup in a homelab, most people working on the CAPVCD side of things will have most of it obfuscated as they will most likely only interact in their own tenant. The VCD Named Disk csi driver works great and offers Read Only Many (RWO). Feel free to hit me up in the comments section to have a chat about this or on Slack in the VMware or Kubernetes workspaces.