In this article we are going to talk about GitOps and deliver it to my home automation setup using ArgoCD. It doesn’t have a VMware twist to it but it will be useful as a prerequisite for a future article. My blog somehow took a very kubernetes’esque turn over the past few months as I very much enjoyed learning about it and only beginning. I am essentially reporting on my learning process in these blogs. Referring to my setup as home automation may be a bit presumptuous as I only use a Gygabite mini-PC on K3S to run a few deployments with ingress to access them and persistent volumes (PV) provisioned on NFS volumes on my Synology NAS.
At the moment, the manifests I used to deploy these things are stored in a folder on the machine itself, which is sub-optimal in terms of flexibility, maintainability and most importantly, there is no version control. I am not organized enough to manage files; I tend to have stuff lying around so I need a way to get this thing in line.
GitOps with ArgoCDs
Enters GitOps, a way to manage the desired state of your resources in a Git repository. That way, the resources are tracked, version controlled, immutable in a Continuous Delivery fashion. ArgoCD is an Open-Source implementation of the GitOps framework. In a nutshell, ArgoCD ensures that the resources defined in a specific Git repository match the resources deployed in a specific Kubernetes cluster. This framework also reduces the risk of mistake as you can enforce peer review on your pull requests before a manifest is merged into the repository.
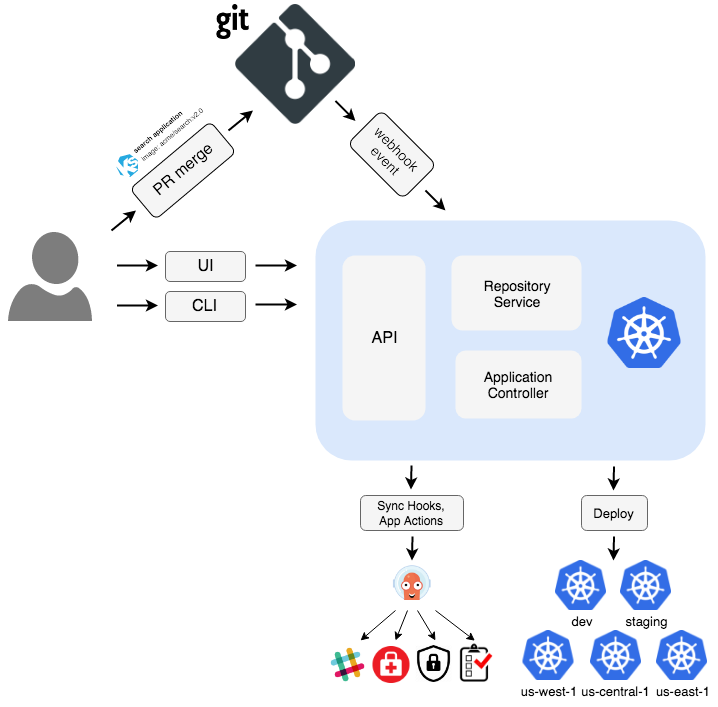
Instead of manually applying manifest with kubectl apply -f, you will simply push the manifest to the Git repository. Once ArgoCD notices the difference it will apply it to the cluster. That is if ArgoCD is configured for automatic synchronization but you can very well leave this step as manual. We are only skimming the surface in here but I wanted to keep as high level as possible for now because 1) I’m nowhere near an expert at this and 2) my VMware reader base is probably also fairly new to these concepts. I hope I don’t alienate you guys too much by the way 😉.
Requirements
The requirements are fairly simple here. We’ll go through the rest of the steps together.
- A Kubernetes cluster with stuff deployed in it (for the example).
- A GitHub repository, preferably a private one as you may want to keep the declarative state of your environment confidential.
Installing ArgoCD
Installing ArgoCD is simple in the sense that you only need to deploy the resources in a Kubernetes cluster. However, I want to point out that we will stick to a basic setup in this blog. Production ready environments would require to give more considerations to user access, secret management…
First make sure the current context is set to the cluster where you want to deploy ArgoCD.
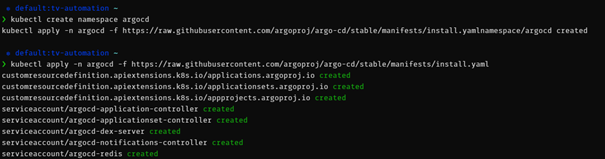
- Create a namespace for ArgoCD and deploy the components using the public manifest. This will install a bunch of custom resources in the cluster along with other built-in resources.
kubectl create namespace argocd

kubectl apply -n argocd -f <https://raw.githubusercontent.com/argoproj/argo-cd/stable/manifests/install.yaml>
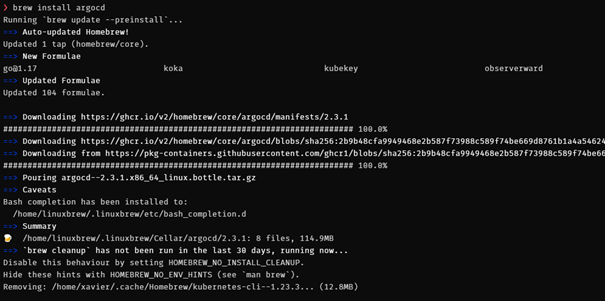
- Next install the argocd command line tool. You can install this on your workstation. This is the command you will use to interact with ArgoCD in command line. You can use it to perform actions such as managing apps, repos, access…
I used brew in WSL but you can download the tool manually if you don’t have it. It’s also available for Mac and Windows.
brew install argocd
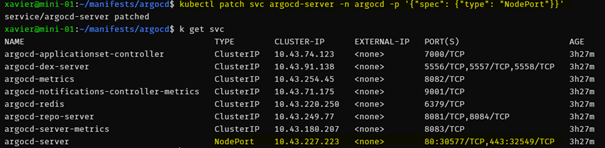
- Next, we want a way to access ArgoCD. There are several ways to do it with service types LoadBalancer and NodePort or with Ingress rules. I am using service type NodePort because I only have one K3S node but you’ll find the doc for each Ingress option here.
kubectl patch svc argocd-server -n argocd -p '{"spec": {"type": "NodePort"}}'
- Next we will get the initial randomly generated default password from the argocd-initial-admin-secret secret.
kubectl -n argocd get secret argocd-initial-admin-secret -o jsonpath="{.data.password}" | base64 -d; echo

- Login as admin with the argocd command using the password and the IP/port of the ArgoCD service.
argocd login 192.168.1.233:30577

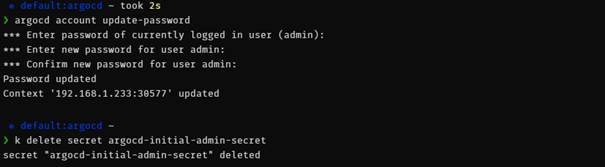
- Change the admin password with the argocd command. Once done you can delete the argocd-initial-admin-secret resource.
argocd account update-password

k delete secret argocd-initial-admin-secret
- You can now query ArgoCD with the command line. By default, the Kubernetes cluster it is deployed in (https://kubernetes.default.svc) is automatically registered in ArgoCD.
If you want ArgoCD to manage remote clusters you will need to register them manually.

Connect a GitHub repository
Now we need to connect ArgoCD to a Git repository. I will be using GitHub but you are free to use other providers. I decided to authenticate with my repo using an SSH deploy key as it allows me to limit access to only this repository. Using a GitHub personal access token (PAT) would give access to all my repositories which I don’t want to.
We’re going to do things in the web UI as it’s a bit more visual and good for understanding I think but you can do all of this using the command line as well.
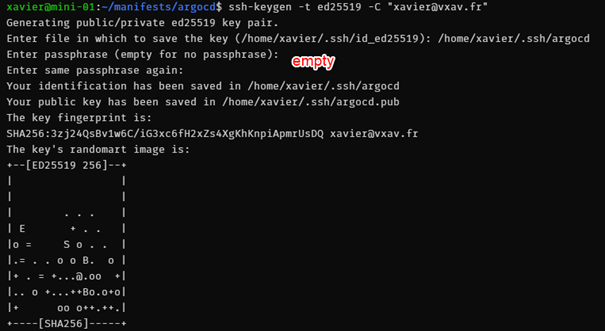
- First create a public/private SSH key pair.
ssh-keygen -t ed25519 -C [email protected]
- Then open the public key and copy the contents in your clipboard.
cat ~/.ssh/argocd.pub
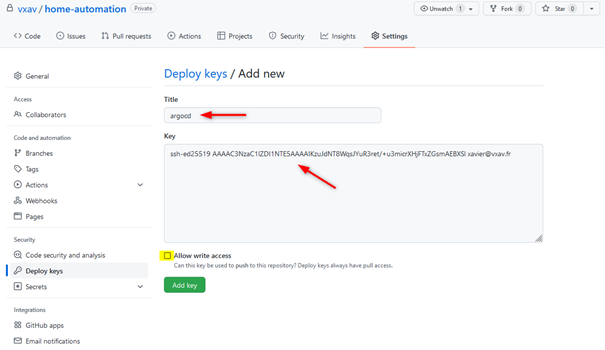
- Next we will add this key to the deploy keys of my GitHub repository. Browse to your repository > Settings > Deploy Keys > paste the key, give it a name and leave “Allow write access” unchecked and click “Add key”.
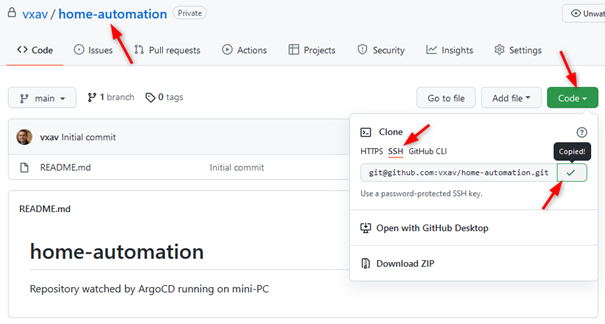
My repo is located at https://github.com/vxav/home-automation but you won’t see it because I set it as private.
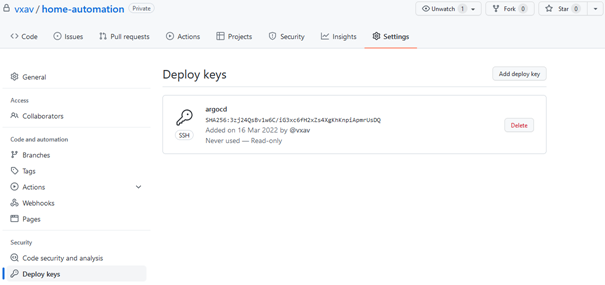
- The key should now appear in the list.
- Next go to “<> Code” > Code > SSH and copy the link.
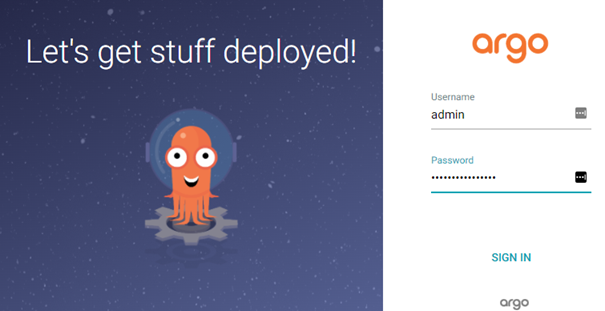
- It is now time to open the ArgoCD web UI. In my case it http://192.168.1.233:30577 and login using “admin” and the password you set earlier.
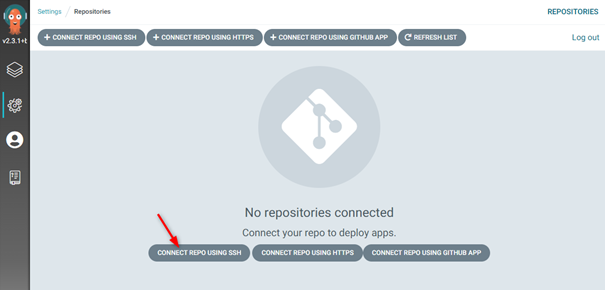
- Click on “CONNECT REPO USING SSH”
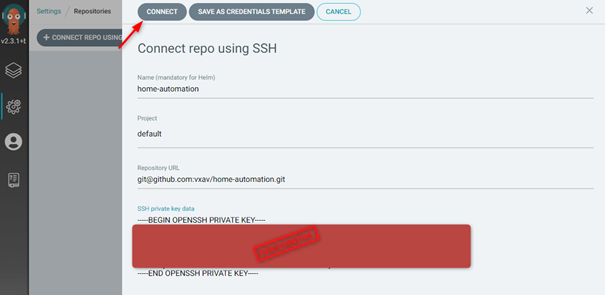
- In the next window you will give the repo a name (use the same as the repo for consistency), set “project” to “default”, paste the SSH url in “Repository URL” and paste the contents of your SSH private key (cat ~/.ssh/argocd) and then click “CONNECT”. This is confidential! Once I paste a private key, I tend to ctrl+c on whatever to remove the contents of the private key from the clipboard.
You can also add a repo in command line like so:
argocd repo add [email protected]:argoproj/argocd-example-apps.git --ssh-private-key-path ~/.ssh/argocd
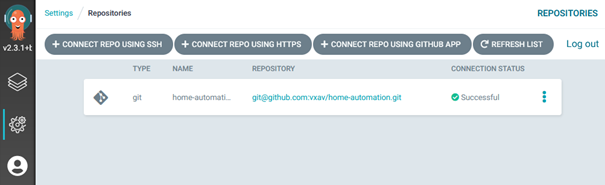
- If everything goes well your GitHub repo should show the “Successful” connection status.
Manage resources with ArgoCD
We now have ArgoCD watching our GitHub repository and our Kubernetes cluster. I already have a bunch of stuff deployed in my cluster that I want managed by ArgoCD in a GitOps fashion. To do that I will:
- Copy my manifests in a folder in my GitHub repo.
- Create an App in ArgoCD matching the folder.
- Synchronize the App in ArgoCD.
Nothing would happen as is as the desired state in the repo would match the current state in the cluster. However, I deleted the resources in my cluster to demonstrate the reconciliation but any further changes made in the repo will be reconciled by ArgoCD.
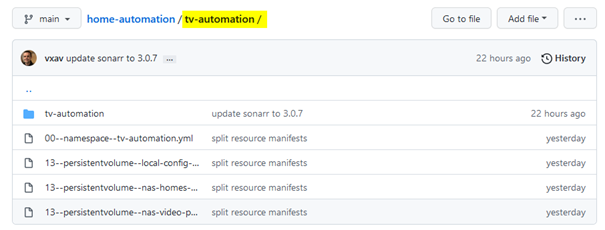
- First copy the manifests in a folder in your GitHub repo. Mine is called “tv-automation” (don’t ask).
- Let’s have a look at the namespaces currently present in the cluster.
As you can see, my home automation resources aren’t deployed in the cluster.

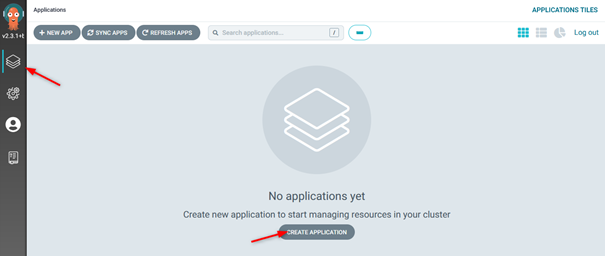
- Go back to the web UI and click on “CREATE APPLICATION” or “+ NEW APP”
- Configure the settings of the application you are deploying.
Application Name: I use the name of the folder in the repo.
Project: Default.
Sync policy: Automatic or manual synchronization of resources. Prune resources will delete resources that are no longer in the Git repo and Self heal will reconcile when changes are made in the cluster and deviates from the Git repo.
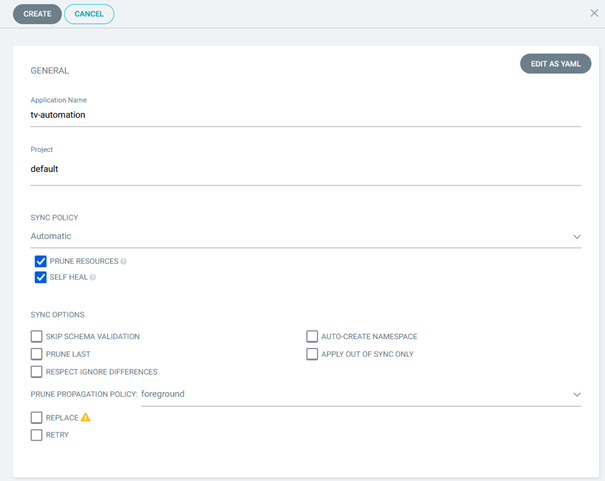
Source: The Git repository we configured earlier.
Revision: You can change the default refence to watch and you can watch a specific.
branch as well.
Path: Folder in which our manifests are stored in the repo.
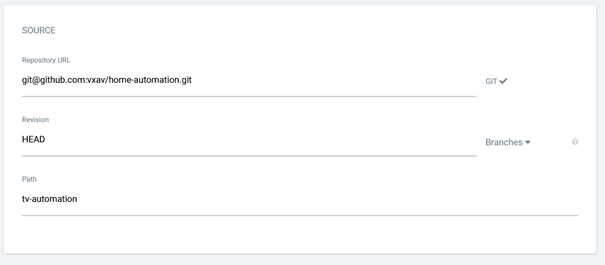
Cluster URL: URL of the kubernetes cluster to watch. By default it is the local cluster where ArgoCD is installed.
Namespace: The namespace where the resources are provisioned.
Directory recurse: Enable so ArgoCD looks for manifests in subfolders.

- Once you’re happy with your app, click “CREATE” and the app should be created and become “healthy” and “synced” once all the resources are created.
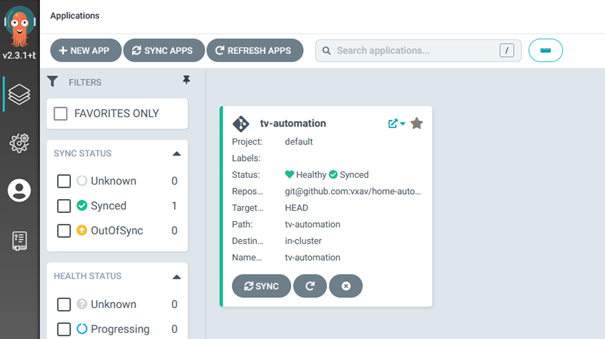
You can also list the apps in command line.
argocd app list

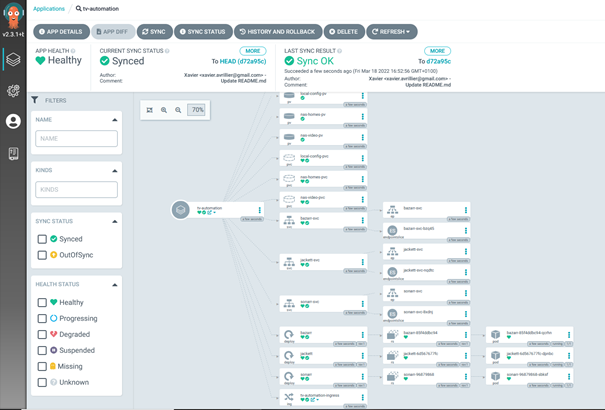
- You then get some cool view of all the resources in the UI with deployments, replicasets, pods, services…
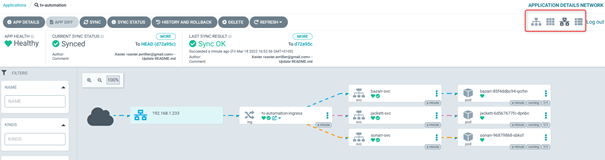
- I particularly like the network view with the different streams. As you can see my setup is very simple with one service type LoadBalancer that serves ingresses for each of my apps.
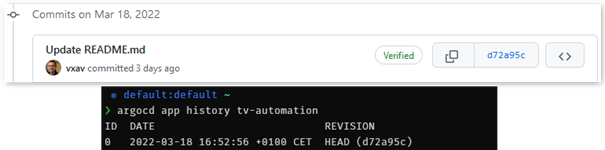
- I will now make a change in the repository. But before that, let’s look at the ArgoCD app’s history. You see the ID of the commit in REVISION.
Argocd app history tv-automation
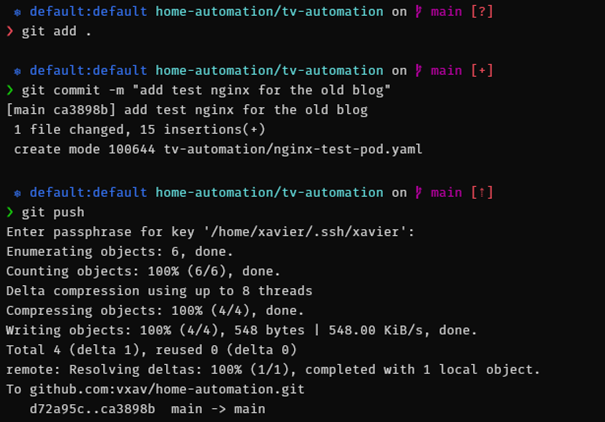
- Next, I will add a basic nginx pod manifest. As you can see, I push the change to my GitHub repo.
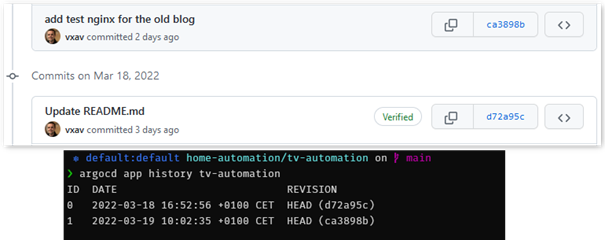
- Because my app is configured for automatic syncing, I don’t need to manually sync it. I only wait for ArgoCD to pick up the commit.
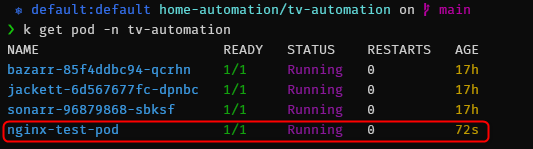
- Then look at the resources in the Kubernetes cluster and the new Nginx pod should be running.
You can then delete the manifest from the Git repository and it will be removed at the next synchronization IF you have enabled auto-pruning in the synchronisation.
Wrap up
And there you go, you now have a GitOps managed Kubernetes cluster where you manage resources from your Git repository. As I mentioned earlier, this is a basic setup aimed at understanding and learning about GitOps. In my next articles I want to manage CAPV or Tanzu Community Edition Kubernetes clusters packaged with HELM deployed in a GitOps fashion.