There is a sea of products on the market to backup virtual machines and they all provide more or less the same core functions. In order to stand out from the crowd and gain popularity, one has to offer innovative features, proven reliability, simplicity to use and a solid customer centric support experience. This is just what Altaro, a company founded in 2009, does with its VM Backup solution that we will review today. Altaro offers the possibility to backup virtual machines of VMware and Hyper-V environments with offsite features and Azure cloud integration.
Installation
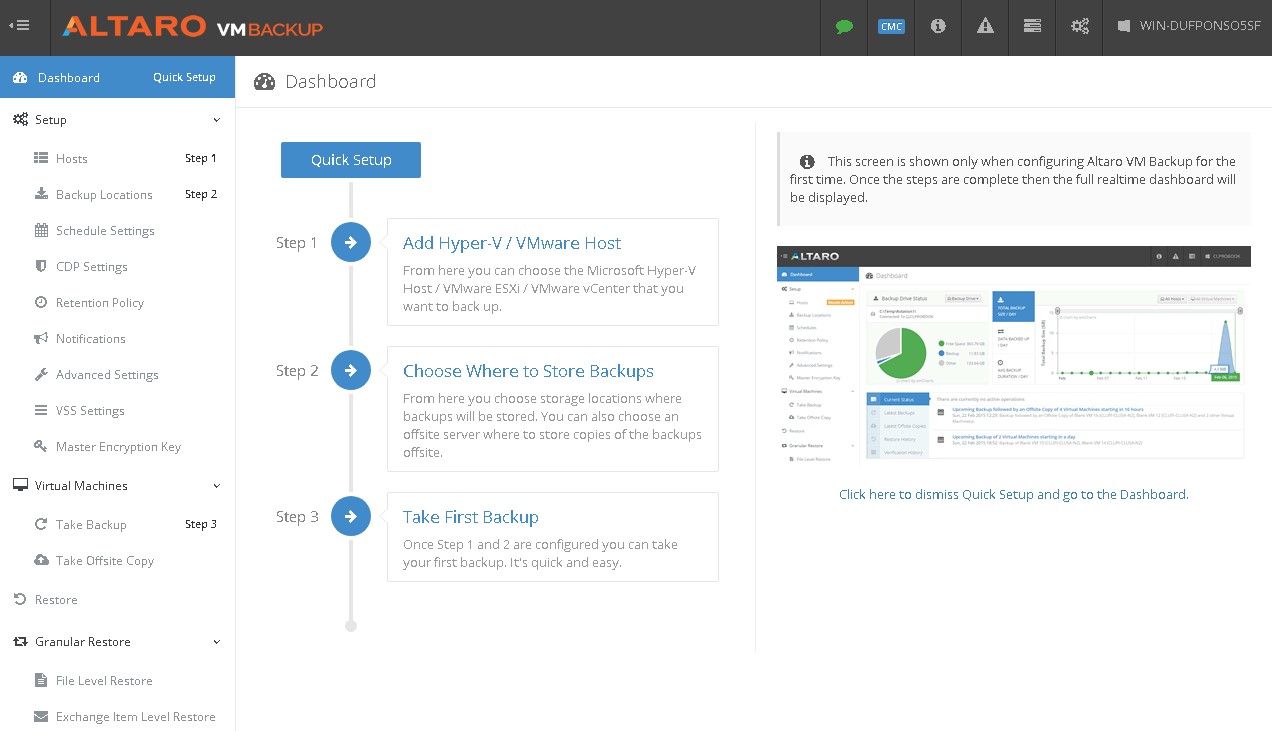
Let’s kick off with the installation process of the Altaro server. This steps is quick and pain free as it is a typical “Next - Next” Windows installer with a license agreement to accept and an installation folder. You can then launch the Altaro VM Backup Management Console and get your server configured very quickly. At the first launch the console will focus on a special Quick Setup mode in which you can easily add hosts, define a backup store location and take the first backup, it doesn’t take more than a few minutes to get your VMs backed up.
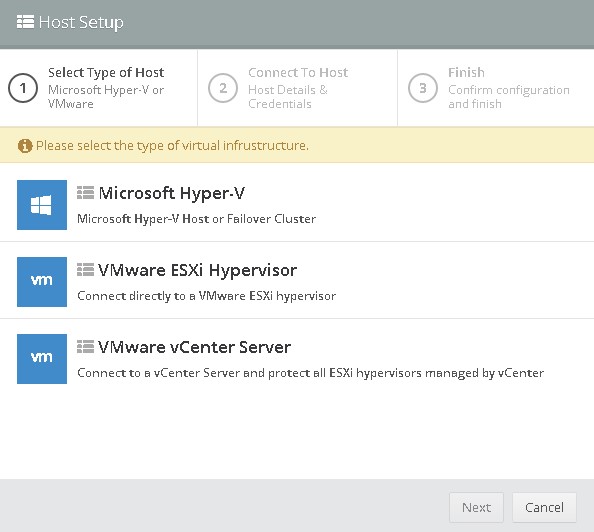
The UI gives you the possibility to configure a vCenter server, an ESXi host or a Hyper-V host as a backup target.
Backup destinations and offsite location
Once the host(s) are configured you need to set up a destination to store the backups. You can chose from a number of destinations that are supported by Altaro VM backup:
- USB External Drives
- eSata External Drives
- USB Flash Drives
- Network Shares using UNC Paths
- NAS devices (Network Attached Storage) using UNC Paths
- PC Internal Hard Drives (recommended only for evaluation purposes)
- RDX Cartridges
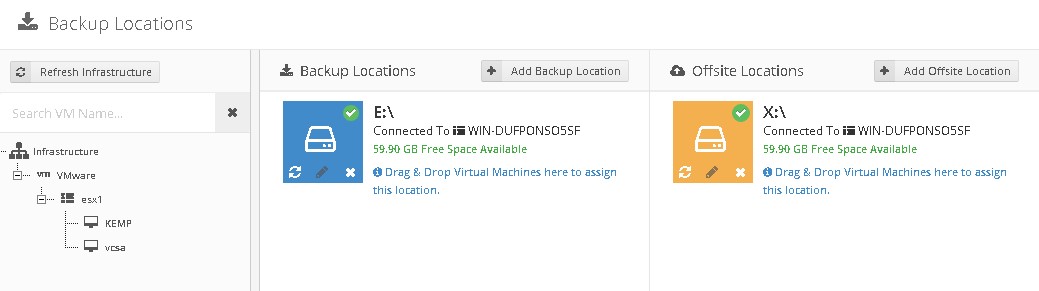
You then have the possibility to send a copy to one of the supported offsite locations. Altaro VM Backup offers again many options to perform offsite copies including the ones mentioned above, in addition to the following two:
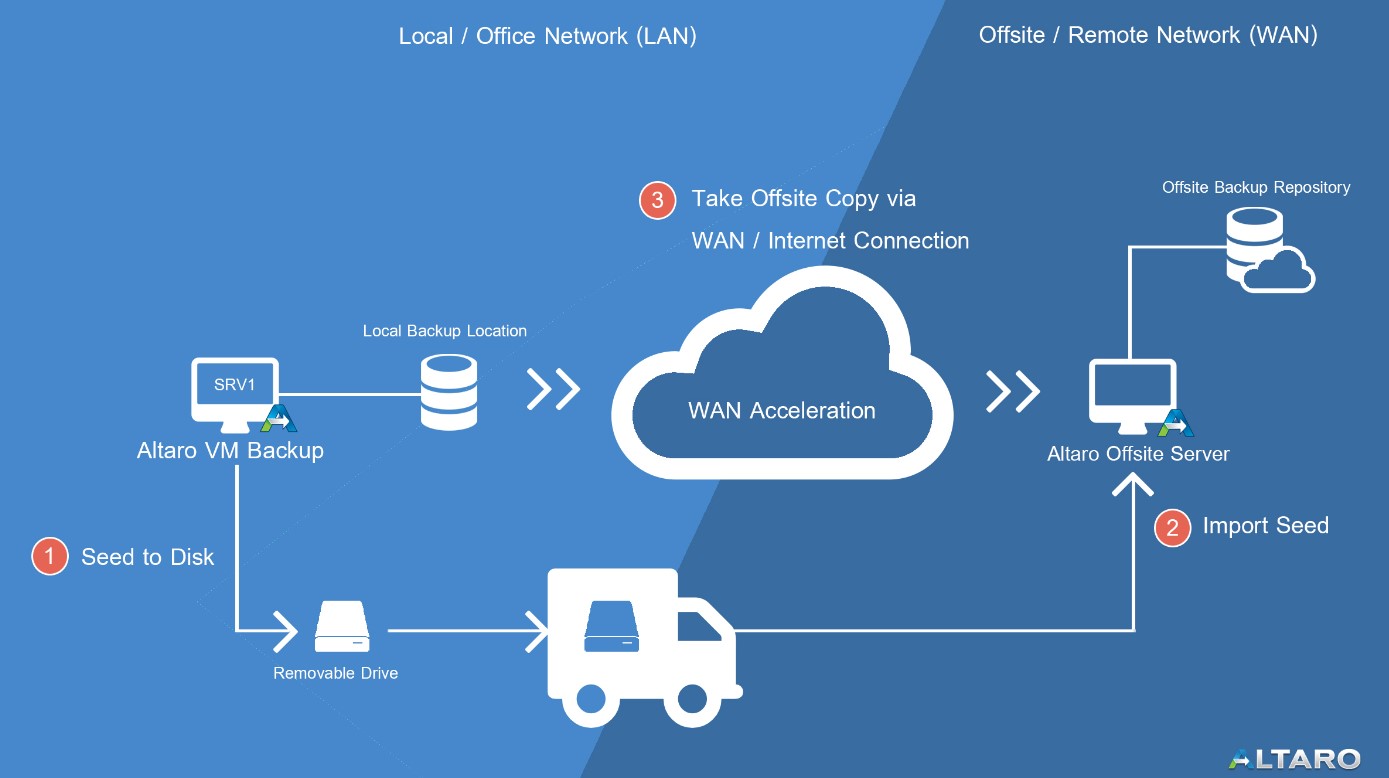
- Altaro Offsite Server: This method consists of another Altaro server reachable over LAN, WAN or VPN that will receive the offsite backups. There is a nice feature called “Seeding to disk” that allows you to physically move the first full to the offsite server (on an external hard drive or drive array) which will then allow you to run only incremental copies over the WAN connection. This can be particularly interesting if the WAN connection between the sites is slow.
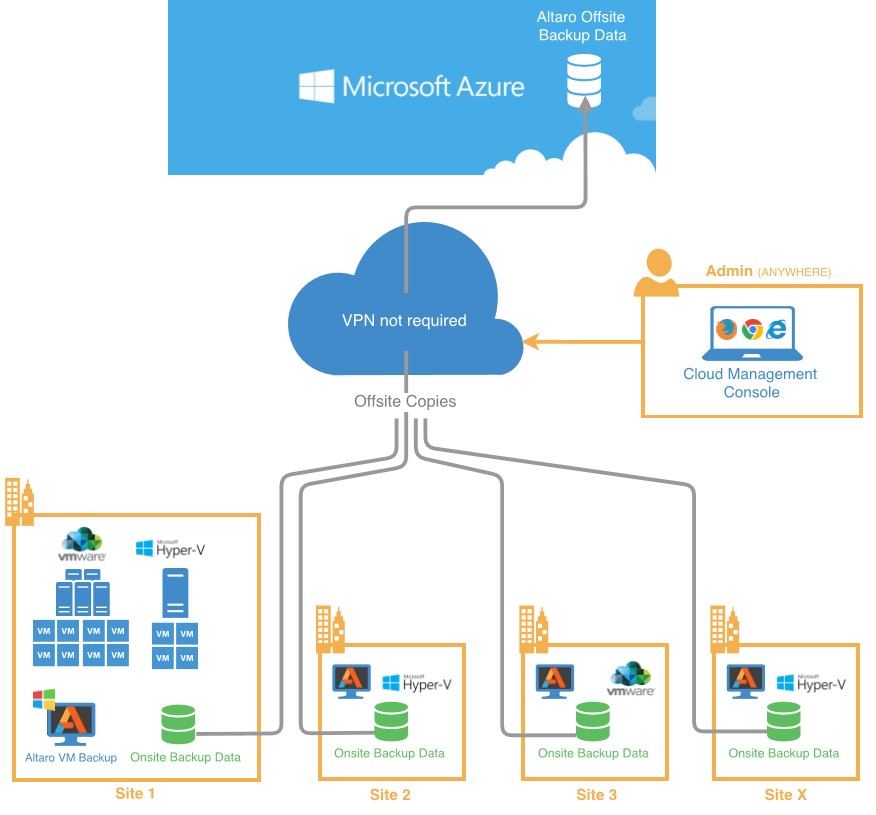
- Cloud Backup to Azure Storage Account: If you have an Azure Storage account you can send your offsite backups to it and keep them nice and safe in the “Cloud”. The cost is improved by the use Azure Block Blob storage, compression and deduplication. Note that you can restore from Azure to a different Altaro server, meaning that if your main site burned to the ground you can still spin up a new one in your B site and restore there. However be aware that the Backup to Azure feature is only available to customers who have the “Unlimited Plus” edition of Altaro VM Backup.
Boot from Backup
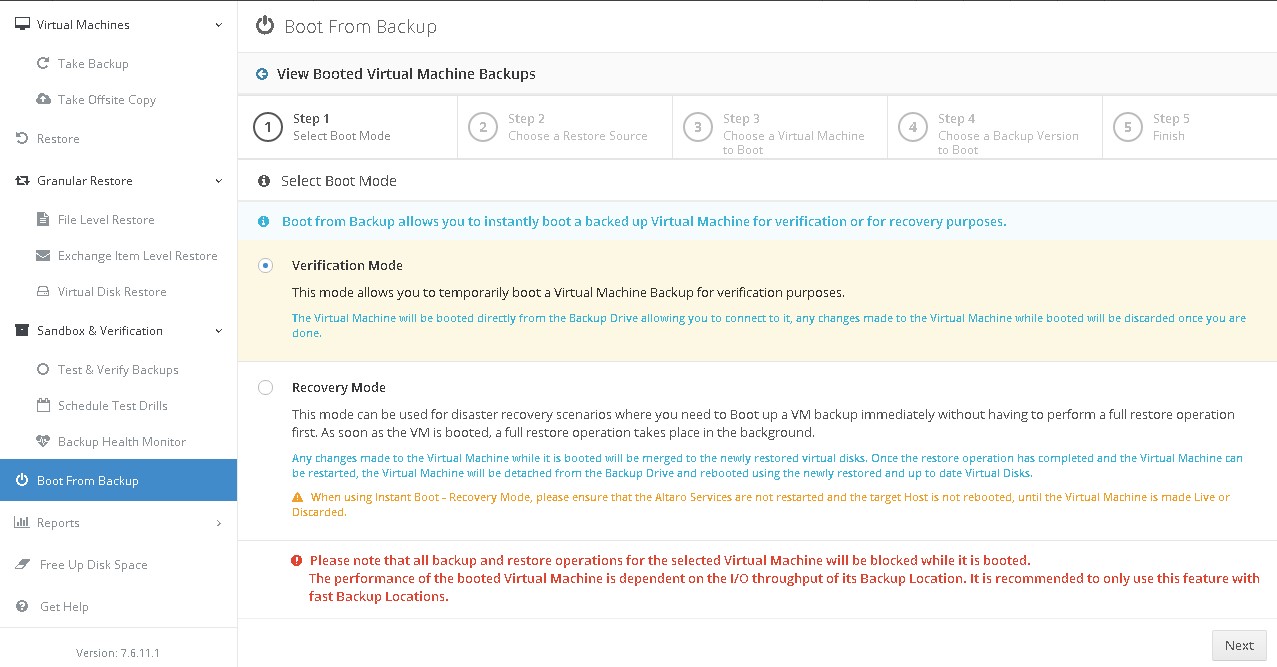
One of the features that I would put in the “Nice to have” basket is the possibility to boot a VM directly from its backup. It is usually not a good sign if you have to resort to this feature as it means you need that VM restored ASAP but you will certainly be grateful for it should this day come. Of course the storage performances of the restored VM will depend on the storage performances of the backend storage server. For instance, if the Altaro server repo sits on a RAID6 and 7200RPM Sata drives you will most likely take a big performance hit.
You can use this feature in Verification mode to ensure that everything works as expected. The VM boots from the backup server and any changes made to it will be discarded once you power it off.
The other mode is Recovery mode, which is the one you don’t want to ever need. In this case an actual restore of the VM is performed in the background while it is running off the backup store. Once you reboot the VM, it will switch to the virtual disk stored in the production datastore and remove the Altaro one.
In order to perform such operation, the Altaro server will create an iSCSI target and mount it on the destination host as a datastore so there will be a few prerequisites to get it working including:
- Ensure that TCP ports 35200-35220 are open on the host. A vib is actually provided to help you do it.
- Ensure the iSCSI Storage Adapter is added to the host.
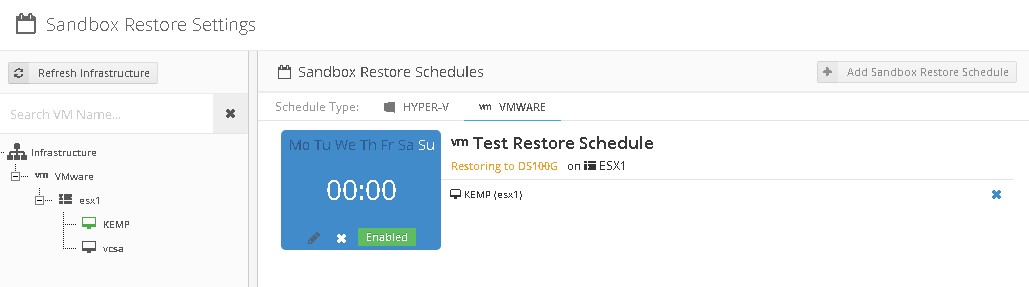
Sandbox and Verification
Having backups and green “check” marks on every dashboard will please bosses and IT managers. However when things get spicy and you need to restore a virtual machine from backup, you better hope that it hasn’t been quietly failing for months and realise you can’t restore it in the most critical moment. This is where the Test and Verify feature will prove very useful.
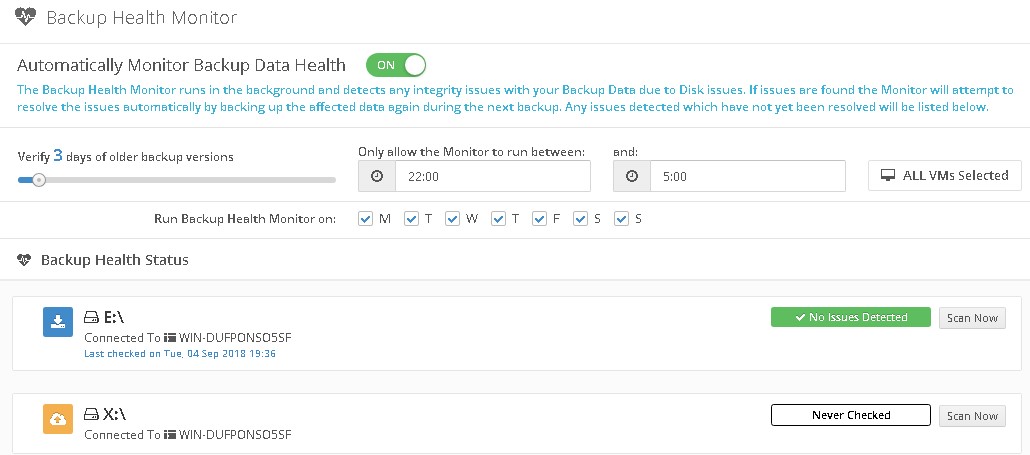
By Verifying you make sure that the backup files of the virtual machine are consistent and the integrity of the files is not compromised. The backups are monitored every day by default but the schedule can be changed to fit your environment.
Checking the files is a must-do but not all. You can also perform a test restore of the virtual machine to make sure that it actually boots up properly. The network adapters are not connected to avoid conflicts and you can have the sandbox VM deleted after x days. The great thing is that it is possible to schedule these restores. You just create a schedule and you then simply drag and drop the objects over it. Of course it will only check that the VM can boot correctly, it does not mean that the service it provides works as it should, this purpose is down to your application monitoring solution.
Pricing
Altaro VM Backup is licensed per host which is a great thing because you won’t have to pay double if you run dual-CPU servers. It is available in 4 different editions with various levels of features.
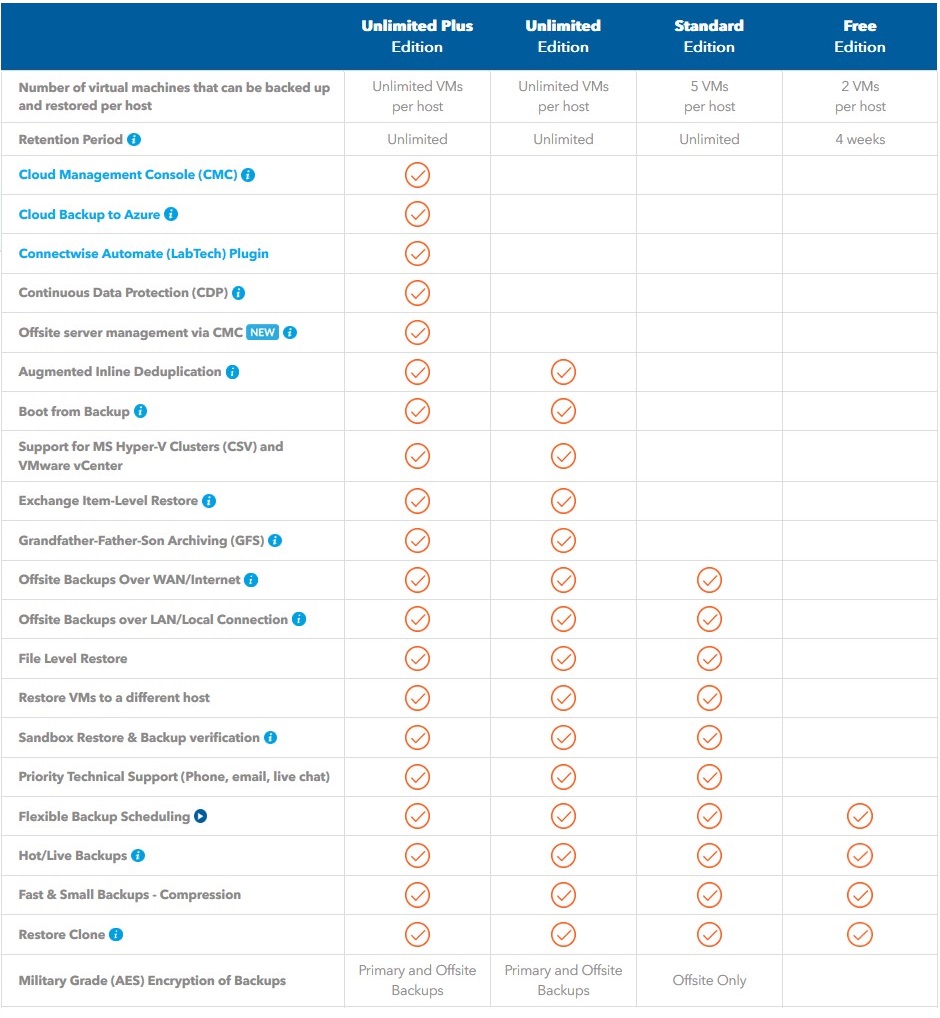
Find more info on pricing on the Altaro website.
Conclusion
The first time I used Altaro in my lab I wasn’t 100% convinced about the user interface but after playing around with it I have to say that I actually really like it and find it a lot more simple and intuitive to use than some of the other products out there. All the core features that a good backup server should have are there with a few welcome extras like the cloud integration, boot from backup and a solid customer support experience directly integrated in the console, very nice. There were two little things that bugged me during my testing. The first one is the way the UI saves changes, if you don’t click the Save button after a change you will be prompted the next time you change menu. If the action doesn’t go through a wizard I would like it to save automatically. The second one is that CDP is not available for the VMware platform as of now but it should come in a future release. A very positive review overall for a backup product that will tick all the boxes for small and medium businesses.
Try it for free
If you want to try it for free just follow this link: https://www.altaro.com/vm-backup/download.php?LP=vxav Select your platform and click Download Now. You have the choice between the 30 days trial which includes all the features and the free version limited to 2 VMs with basic functions:
Follow this link for the list of hardware and software prerequisites: http://support.altaro.com/customer/en/portal/articles/808716-what-are-the-system-requirements-for-altaro-vm-backup-