One of the most important operations in running a virtual environment is to perform major upgrade of the system. The vSphere Update Manager simplify greatly the process and makes it look transparent when everything goes well. Even if 9 times out of 10 everything will be fine, it is always good to take extra care with these maintenance operations to avoid that scary tenth time. Just like everyone does with the test groups in WSUS, it is best practice to test every build in a dev/test cluster running the same kind of workloads as your production. This way you can give it a few months to discover potential issues relative to your environment and then patch your production. If you don’t have the chance to have such infrastructure, it is still better to wait a little while before upgrading your prod to let other companies run into these problems (in their pre-prod) and get their feedbacks, resulting in editor’s patches to fix them.
Dell’s customized ISO
In this post I will go through the steps involved in the process of updating a Dell server running ESXi 5.5 to the latest version 6.0 update 2 of vSphere. I mention Dell because I am going to use a customized Dell ISO to get the latest certified drivers and patches embedded in the image.
Why do I use a Dell customized ISO?
- Ease of drivers and specific packages management.
- Simplify and shorten the execution of support tickets with Dell.
- Dell server, Dell software, it makes sense to me.
In order to have an idea of the difference I downloaded the latest ISO build “3620759” from VMware’s website and from Dell’s website and compared their vibs using PowerShell. Quick reminder on how the PowerShell’s Compare-Object cmdlet works:
- <= Objects only present in the reference (ESXiStock)
- => Objects only present in the difference (ESXiDell)
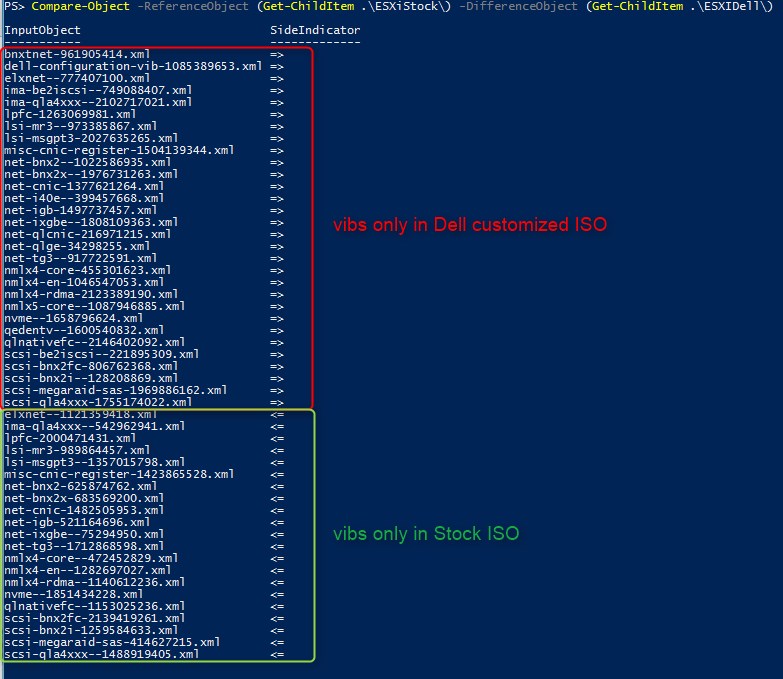
The 2 main things I notice about the Dell build compared to the stock one:
- More recent packages versions.
- Greater number of packages, most likely drivers for hardware used in their servers.
I was actually surprised to see that the Dell build embeds more recent drivers, I guess VMware relies on the manufacturers to customize their ISOs with versions certified by their Support, which would make perfect sense.
Requirements
Upgrading hosts to a new major version isn’t something you do every day and it is a critical piece of maintenance as it can leave you with a bunch of resources unavailable for a while if something goes wrong. So in order to avoid bad surprises and a night behind the screen sweating like hell, better get ready for the worst case scenario:
- Make sure you have vCenter updated to the last version before doing your hosts!
- If you’ve never done it before, build a lab and do some testing to get comfortable with the process,
- Be sure to have enough resources to satisfy your admission control’s policy even with a host down,
- Even if admission control is stasfied, if the resources available with a host down are likely to put your VMs in a bad position (CPU ready, network bottleneck, …), make a list of all the VMs that you can safely shut down or that are not critical. If the host you are patching was to stay down longer than expected because of a problem, you’ll still need to run your VMs while figuring out what happened.
- Take a backup of your host’s config, or make sure you can rebuild it quickly.
Download the right iso image
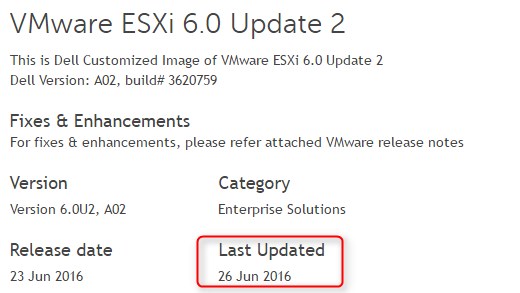
First of all we need to download the latest version of the Dell customized vSphere 6.0 image. I find the Dell support website a little bit confusing, I couldn’t find my way through to the last vSphere downloads but google got me there: www.dell.com/support/home/us/en/04/Drivers/DriversDetails?driverId=HPK76
As of today the latest Dell ISO is the 6.0U2, A02.
Even though it’s not really necessary as long as your server is in the hcl I check that my model is listed under the compatible systems. Blade M630 in my case. Now scroll down to verify that it is the latest version and go to the most recent one if there is one (last version in this screenshot).

That done, find the iso image in the “available formats” section and click “download file”.
Create the host upgrade baseline
This article assumes that you already have a vSphere Update Manager server installed, configured and working.
Log in vCenter and go to the configuration of Update manager in “Manage” > “ESXi Images”.
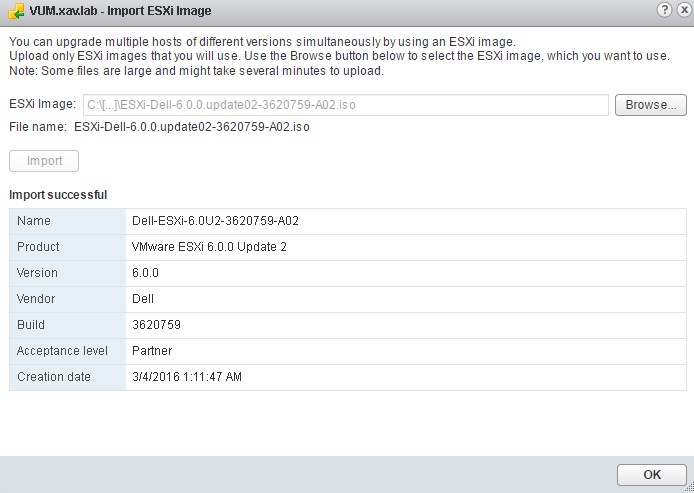
Click “Import ESXi Image…” > Browse to the location where you stored the ISO you just downloaded and click “Import”.
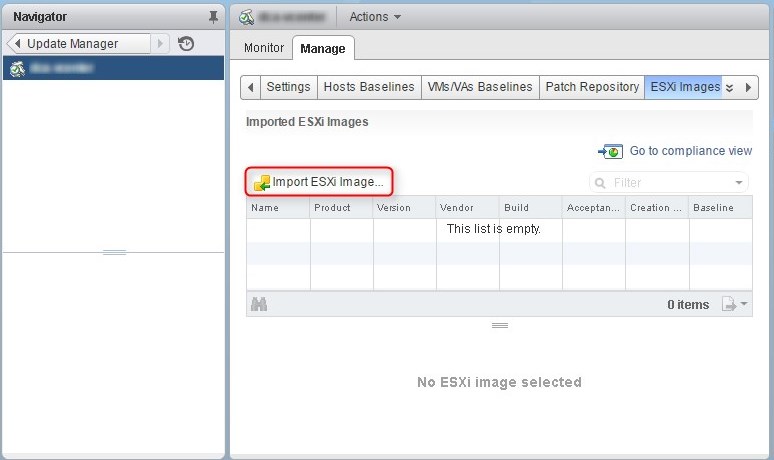
Once the import is finished validate by clicking OK.
Go to the “Host baseline” tab and create a baseline by clicking the green plus.
Check “Host Upgrade” to make it a major upgrade and not a patching one.
Enter a name and description that your colleagues can easily understand and click next.
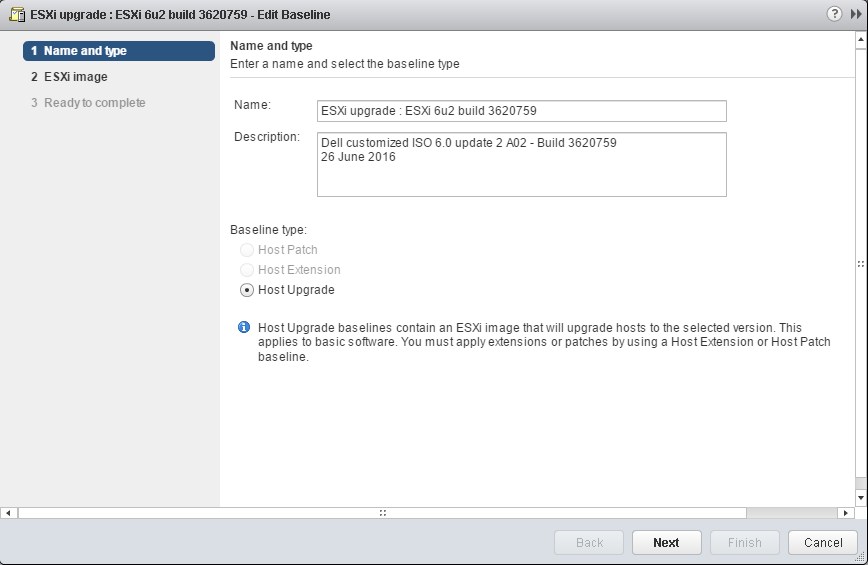
Choose the ESXi image that you just uploaded and complete the wizard.
Now the baseline is created we can attach it to host, cluster or datacenter objects.
Attach the baseline and remediate the host
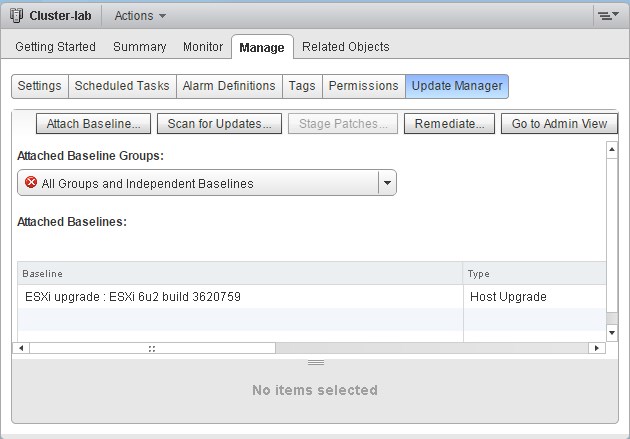
Now attach the baseline to the cluster by right clicking on it, in the contextual menu go to “Update manager” > “Attache baseline” > Check the baseline you just created and click OK.
All the hosts in your cluster now have the baseline attached and can be scanned and remediated (you can attach it on a per host basis).
Scan your cluster for updates by right right-clicking on it > Update Manager > Scan for Updates and wait for the scan to finish. You’ll see that your cluster is non compliant to your attached baselines.
Then put the host you want to upgrade in maintenance mode.
Note that you might need to disable admission control if for example you have a 2 nodes cluster with a tolerance of one host loss.
Once it is done right click on it > Update Manager > Remediate
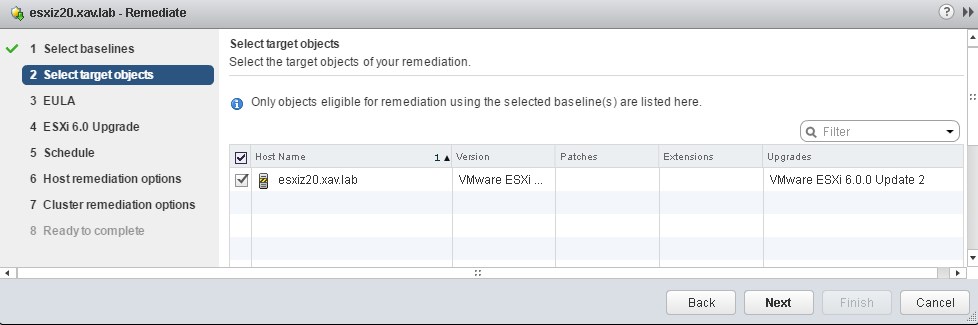
Select the baseline we created earlier containing the last ESXi ISO.
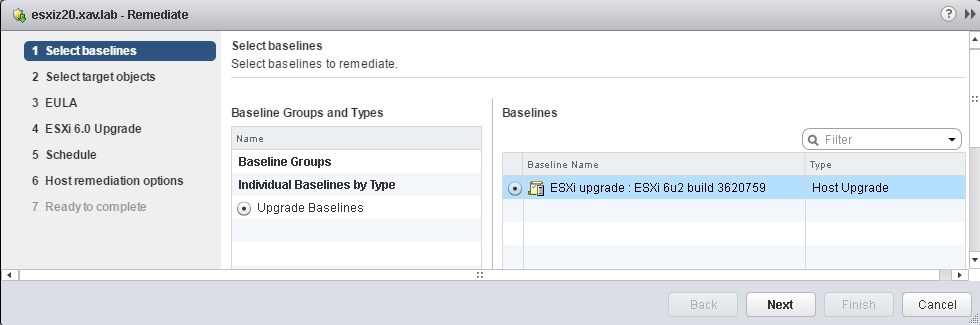
If you triggered the remediation while positionned on a host you’ll only see this one, otherwise chose the host you want to upgrade.
Then I chose not to ignore the warnings about unsupported hardware devices but this one is up to you.
Give the task a name and run this action now.
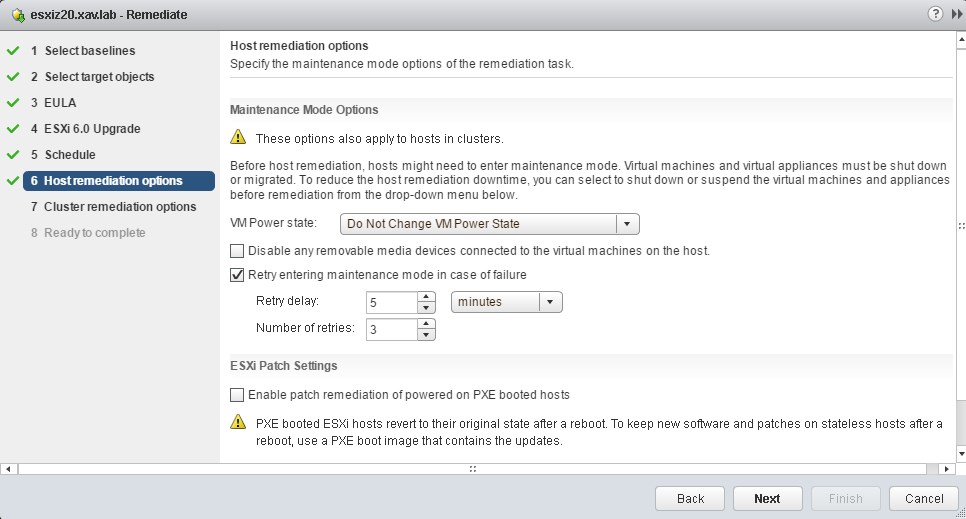
Leave the default Maintenance mode options as it is already correctly configured.
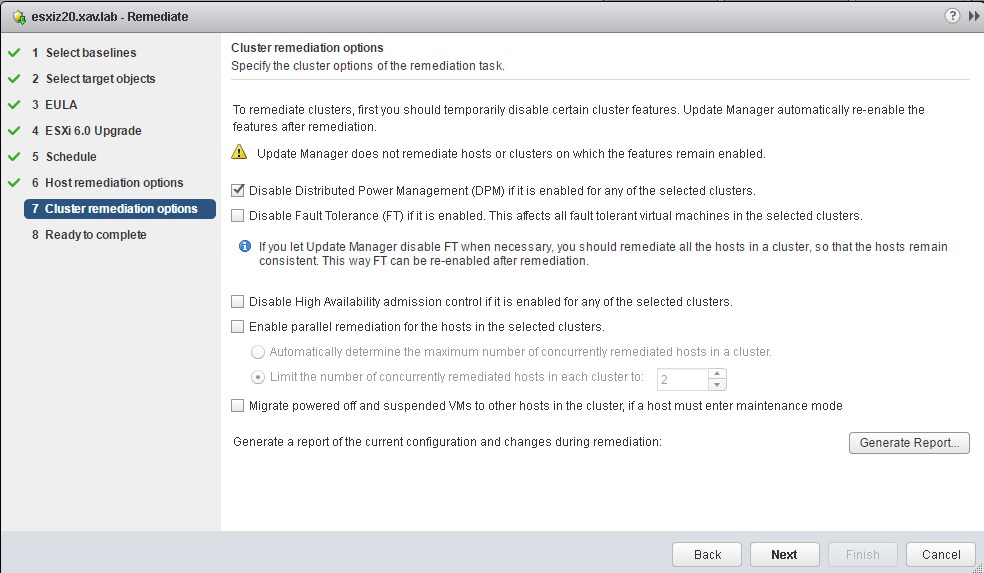
For the remediation options I leave the default options as well but it will depend on the available resources in your cluster and the level of “risk” you are willing to take.
I am usually very cautious when it comes to upgrades, even after having them tested in pre-prod before because you never know what can happen. That is why I don’t allow the remediation of multiple hosts in parallel (Or at least not the first one).
I don’t check the box to disable HA as I know I have enough resources in my cluster to place a host in maintenance mode without violating my admission control’s policy. but again if you already put the host in maintenance mode prior to do the remediation it is very likely that you don’t need to check it.
Click Next, review the settings, double check it’s the right host and the right build ;).
Click Finish.
vCenter will then proceed to upgrade the host which will trigger a restart. The operation takes a little while so this step is all about patience.
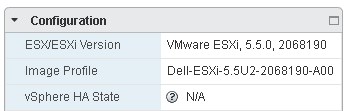
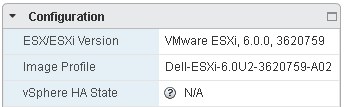
When the operation finishes you can check the ESXi version and take your host out of maintenance mode, as you can see it is now 6.0.0, 3620759 in my lab.
This was for the upgrade of the system. After doing it run a scan and remediation of the host for the critical and non-critical patches baselines to apply the ones that were published by VMware after the release date of the ISO build you’ve downloaded.
VMware tools and virtual hardware
Don’t forget these two steps for your virtual machines, I advise you to do the virtual hardware upgrade once all the hosts are upgraded. You need to do them in the following order, the vmware tools contain the drivers for the new virtual hardware!
- Upgrade VMware tools version.
- Upgrade virtual hardware version.
The VMs will automatically upgrade the VMtools after a reboot (according to the default baseline if you’ve kept it enabled) which is fine as it is retro compatible with earlier versions of ESXi. The virtual hardware upgrade however needs to be triggered manually and an upgraded VM cannot be migrated to a host with an earlier version of ESXI (see the compatiblity table below)!
| ESX/ESXi | vHardware |
|---|---|
| 6.x | 11 |
| 5.5 | 10 |
| 5.1 | 10 |
| 5.0 | 8 |
| 4.x | 7 |
| 3.x | 4 |
| 2.x | 3 |
And that’s it, now you can update the other hosts/VMs and have a cluster nice and patched.